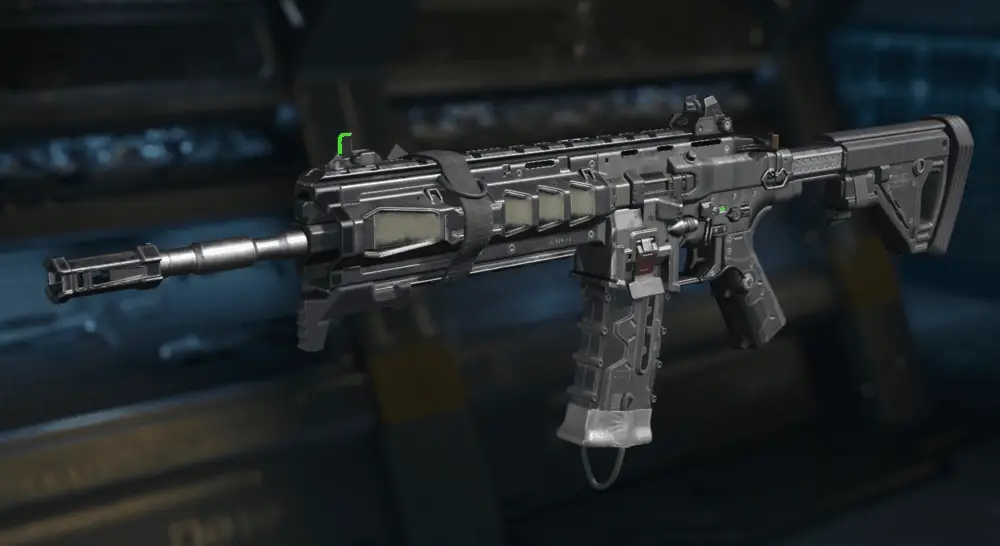
The ICR-1 is a moderate damage and moderate rate of fire Assault Rifle. Today’s weapon guide goes in-depth and looks at the ICR-1s stats such as damage, recoil, and rate of fire.
With these stats, we recommend the best attachments and class setups to use when running the ICR.
Thirdly, we give our top 3 class setups to use for the ICR-1. These class setups are our go-to when using the weapon.
Weapon background
The ICR-1 is yet another Black Ops 3 throwback which makes a return in Call of Duty Mobile. It was a pretty viable weapon in BO3 because of its moderate damage and minimal recoil.
Stats
- Damage: 45
- Rate of Fire: 57
- Recoil: Low
- Range: 48
We can read from the stats above that the ICR-1 is a 3 shot to kill AR. Within close quarters the weapon will down an enemy in 3 shots. However, in medium to long-range engagements, it will drop off to 4 to 6 shots.
As with the ICR-1 from BO3, the recoil is quite low making the weapon a very accurate contender.
Best Attachments
The best attachments for the ICR-1 are Quickdraw, Stock and Extended Mags. These attachments will speed up the weapons usability in close range, which is where the ICR-1 excels.
If players find the iron sights to be cluttered, we suggest using a Red Dot Sight or another scope.
| Check out these Awesome COD Mobile guides while you’re here |
| COD Mobile Top Tips to DOMINATE |
| COD Mobile Best Places to Land for Loot |
| COD Mobile Assault Rifle Guides |
Best Class Setups
Here are the best class setups for the ICR-1 in COD Mobile. Each class takes into consideration a different objective and playstyle.
Class 1 – ICR-1 Unorthodox
This class is geared towards players that love to play the game a little differently and have some fun doing so. Load the following attachments onto the ICR-1:
- Red Dot Sight
- Quickdraw
- Stock
- Extended Mags
Class Setup
The remainder of the loadout is geared towards trying new perks out and being unorthodox. Try it, sometimes you’ll find out different things about these perks that you never knew.
- Secondary: Strap up with the J358 pistol for maximum power per shot.
- Perk 1: Persistence keeps your scorestreaks upon death but they’ll cost you double.
- Perk 2: Hard Wired protects you from enemy Counter UAVs, EMP. Tracker effects are also reduced.
- Perk 3: Engineer shows you enemy equipment through walls. You can also re-roll care packages and booby trap enemy care packages.
- Lethal: Try out the Sticky Grenade AKA Semtex. It’s great for clearing campers.
- Tactical: EMPs are great especially when you hear the enemy has called in air support.
Class 2 – ICR-1 Run and Gun Beast
This class does exactly what it says in the name, it makes you a beast when running and gunning. Fit the following attachments to the ICR-1:
- Red Dot Sight
- Quickdraw
- Stock
- Fast Mags
Class Setup
The rest of the loadout is designed to make rushing more viable.
- Secondary: The MW11 has a fast fire rate so it works well in rushing classes.
- Perk 1: Lightweight keeps you running for longer and faster.
- Perk 2: Toughness is a great perk to lower flinch in case an enemy gets the first few bullets off on you.
- Perk 3: Dead Silence is a very handy perk in a rushing class. Especially as you will be doing a lot of flanking.
- Lethal: Throw down the Trip Mine to secure your 6.
- Tactical: Stuns are thrown faster so they are better for rushing, use them.
Class 3 – ICR-1 Objective Martyrdom
The final ICR-1 class is designed for the brave soldiers that won’t give up until they have the B flag captured. Kit the ICR-1 with the following attachments:
- Red Dot Sight
- Extended Mags
- Quickdraw
- FMJ
Class Setup
This class is built for the heroes of Domination and Hardpoint. The brave ones that stay in the objective until the end.
- Secondary: The J358 packs a punch in close quarters combat.
- Perk 1: Flak Jacket will protect you from enemy nades and Trip Mines.
- Perk 2: Toughness staves weapon flinch if the enemy gets one off before you.
- Perk 3: Tactical Mask is essential to mitigate enemy flash and stun spam.
- Lethal: Try the Sticky Grenade in this class.
- Tactical: Trophy Systems are extremely effective when placed in a hardpoint or on a flag.
