

So you have taken the dive and you’re going to start streaming. Congratulations, it’s going to be a fun ride.
However, you’re not really sure how to set up your stream. If you have chosen Streamlabs OBS. We have a great guide to get you started. This will help you get your first stream up and running using Streamlabs OBS.
If you are still not sure about what you need to become a streamer. Check out this article we wrote on everything you need to become a streamer. It goes through absolutely everything you need to know. So without further ado, let’s get into the guide.
What is Streamlabs OBS?
This is how Streamlabs describes themselves from their about page:
“We are Streamlabs, a technology startup based in San Francisco. We build tools and software allowing live streamers to engage with viewers, monetize their broadcasts, and grow their channels.”
Basically, Streamlabs lets you add all the juicy bits to your stream. Things like overlays, widgets, and alerts. It also allows you to take donations and play music on your stream. They even have an app that lets you stream on the go, pretty sweet.
Download Streamlabs
The first thing to do is to go to Streamlabs and download the application for Windows. The application is about 237MB. When it is finished downloading. Click on the exe file and run the setup wizard. Accept all the prompts. This process will take a few minutes depending on the speed of your device.
Log in with Your Chosen Platform
If you haven’t already created an account on Streamlabs. It gives you the option to log in with a variety of accounts including Twitch, YouTube, and Mixer.
So whichever streaming platform you use, login with it. Logging in with Twitch or YouTube will auto-sync your Streamlabs account to your chosen streaming account.
Launch the Streamlabs Application
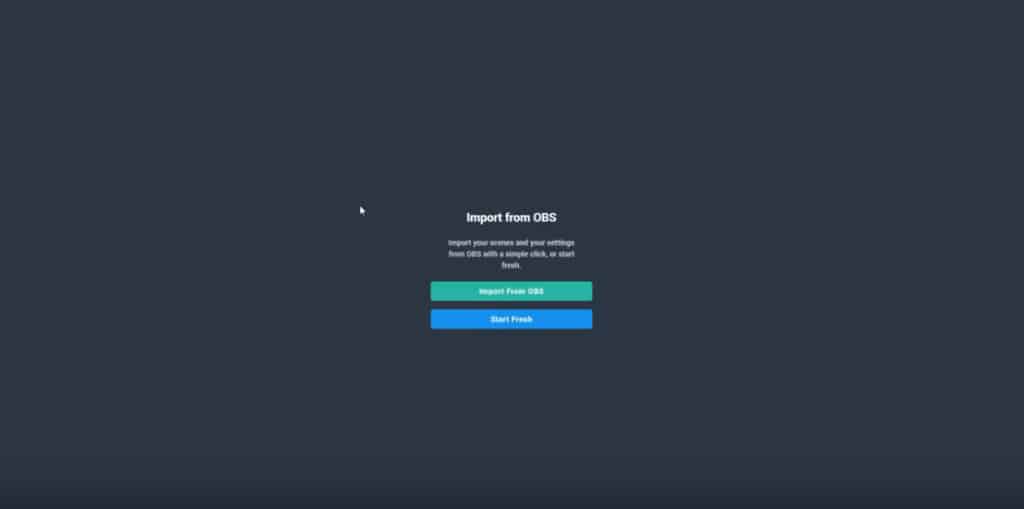
When you launch the Streamlabs app it will ask you to Import from OBS or Start Fresh. For this guide, we will choose the Start Fresh option because we’re going to take you through the features step by step.
After you select the Start Fresh option you will be taken to the User Interface for Streamlabs OBS.
Navigating the User Interface

From left to right, you will see the Dashboard option. The Dashboard contains the analytics of your streams, recent events and alerts, and widget options.
Next to the Dashboard option, you will find the Cloudbot. The Cloudbot allows you to make custom stream commands, set timers and make polls.
Besides the Cloudbot option, you will see the app store. The app store is a great addition to Streamlabs. It’s basically a shop with a range of tools created by the streaming community. Here you can find overlays, timers and more.
The Theme menu features hundreds of different design elements you can add to your stream. Here you will find streamer packs like overlays and widgets.
It also lets you search for specific overlays based on your game genre. For example, if you play First Person Shooters. You can search for this genre to find an overlay design based on FPS gaming.
The Editor section is where you will spend a lot of your time modifying and adjusting the look of your stream. Here you can add sources like display captures and microphones.
Finally, the live section is the interface you will use when you go live. It contains all the important information on one tab so you can monitor your stream efficiently. This includes monitoring recent events and stream uptime.
Setting Up Your First Scene in Editor
A scene is what the viewer will see on the screen when your stream goes live. For example, when you are watching a streamer and a “be right back” image appears on the screen. The streamer has changed the scene because they need to leave the stream for a moment.
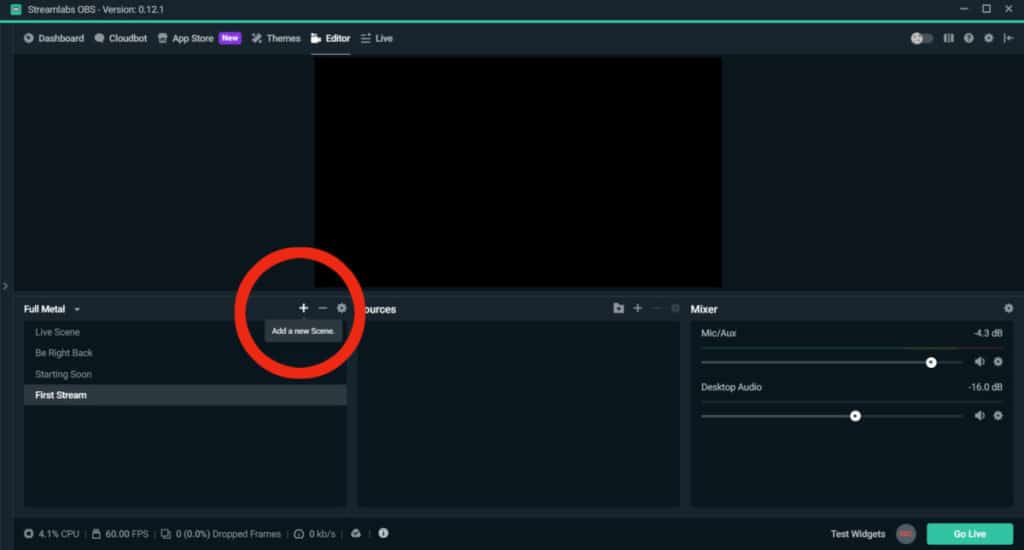
Create a Scene
To create a new scene click the plus sign. A pop up will appear asking you to name your new scene. Name the scene and click done. Name the scene anything you like. I will name it Stream 1 for this guide.
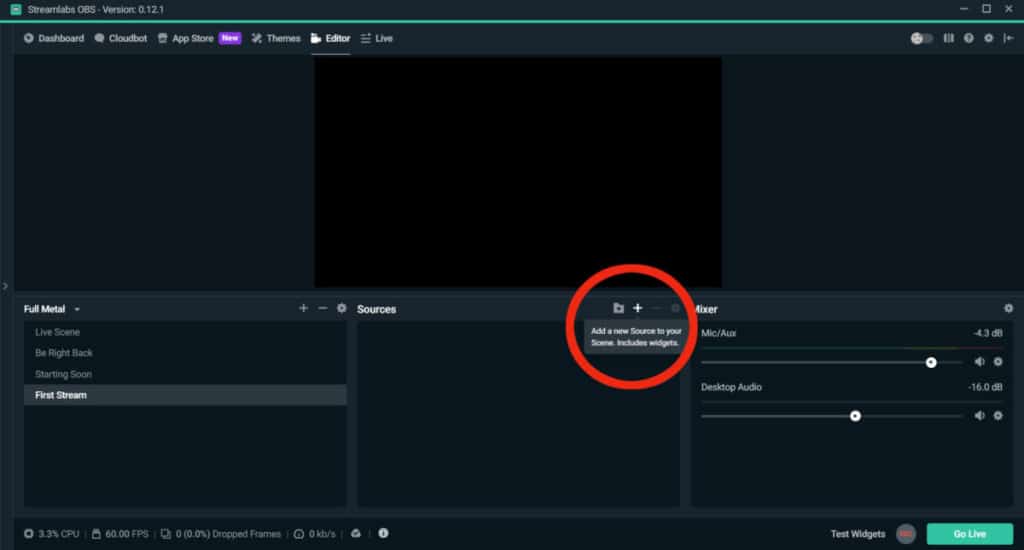
Add a Source
In the center of the Editor, you will see the sources section. Click on the plus sign to add a source. A source is what you want to display on your screen.
The first source we will add is a display capture. The display capture lets you display your monitor’s screen on your stream.
The second source we will add is the webcam option. Follow the same method as above. Click the plus sign in the sources menu. Select video capture device, choose your device and click Done.
Configure the Mixer
Thirdly, the mixer option gives you the ability to configure your mic audio, desktop audio, and video capture device.
The first thing to do is to click the gear icon in the top left that says advanced audio settings. When this menu pops up you will see the options to adjust the volume of the mic, desktop and capture device.

The only thing to adjust here is the desktop audio volume. Set it to between 50 and 60 percent. This way the game volume will be half of your mic volume.
As a result, viewers will be able to hear you over the game sound. Games can get loud as you know. As always click Done to save changes.
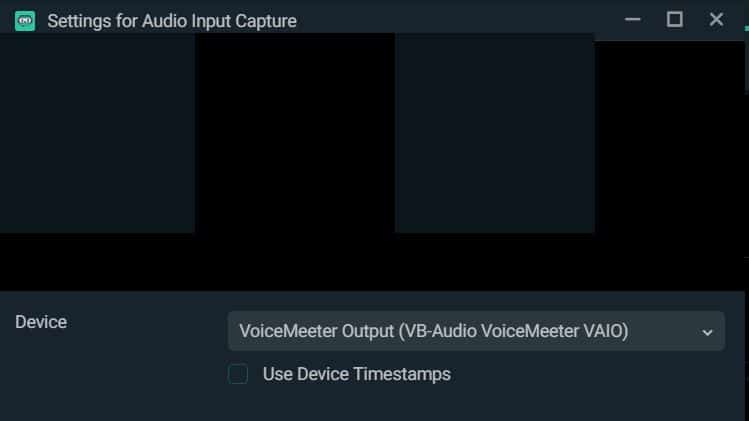
The next step is selecting your desktop audio device. On the mixer-menu select the gear icon next to the desktop audio tab. Select which audio device you want to stream sound from, click Done to save.

After you have selected the desktop audio device. Next, choose your mic device. Like we did in the previous step. Click on the gear icon next to the mic/aux tab. Click Properties and select which mic device you wish to use.
Don’t Forget Your Stream Key
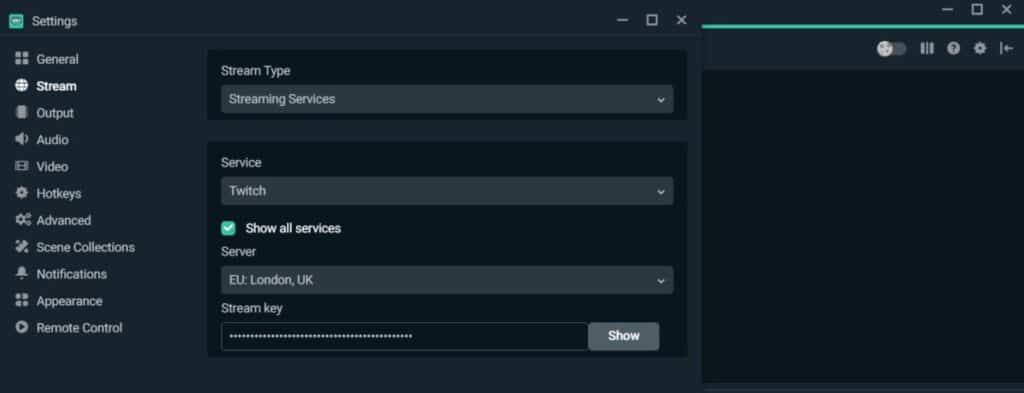
Before you go live you need to make sure you have configured your stream key. Click the gear icon in the top right corner of the app. The settings will appear. Select the Stream option.
At the bottom, you will see the Stream Key option. Here you can copy and paste your stream key from your chosen streaming service.
How to get your Stream Key
Twitch
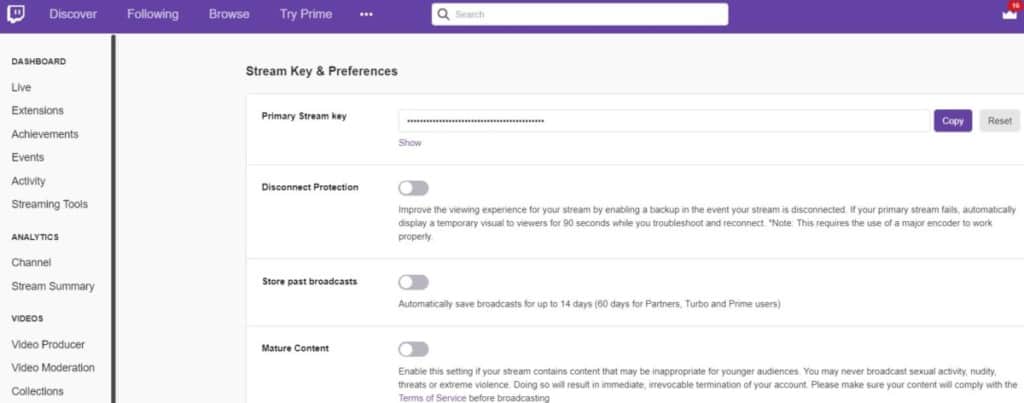
Click your Twitch user icon in the top right corner of the Twitch homepage. The menu will drop down. Click the settings option. From the settings menu, select the Channel and Videos option. You will be taken to the Stream Key and Preferences menu. Here you will see your stream key. Copy it and return to Streamlabs. Paste the key into Streamlabs. Click Done to save.
YouTube
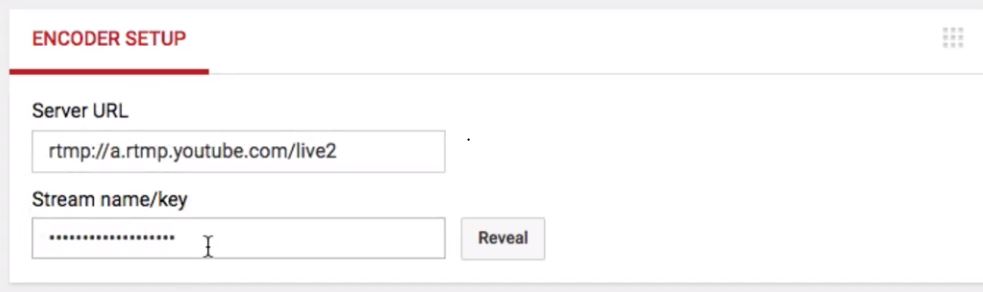
Go to your Creator Studio. Click the Live Streaming option in the tab on the left. Scroll down to the Encoder Setup. Here you will find your Stream Key. Copy it. Go back to Streamlabs and paste it into your Stream Key section. Click done.
Mixer
Go to your Mixer homepage. Click your profile icon. Click Broadcast Dashboard to enter. At the top of the menu, you will see the Stream Key under “Time to Broadcast”. Copy it and paste it into the Stream Key settings area in Streamlabs. Click Done to save.
