Many of us gamers prefer to play our PC games on a controller. Especially those who have come from playing consoles most of their lives. This guide will show you how to remap any controller including an Xbox controller using JoyToKey.
A lot of new games will come with controller support built-in. However, a lot of the older games lack this feature, unfortunately.
That’s where JoyToKey saves the day. It’s a simple and smart software that takes a few minutes to set up and configure.
Download JoyToKey
The first step is to download JoyToKey from its official website. Select the first file under “Download the latest version”. The download file will be a ZIP file. Open the ZIP file and run the setup wizard. Follow the instructions until complete.
Setup and Configure JoyToKey with Controller
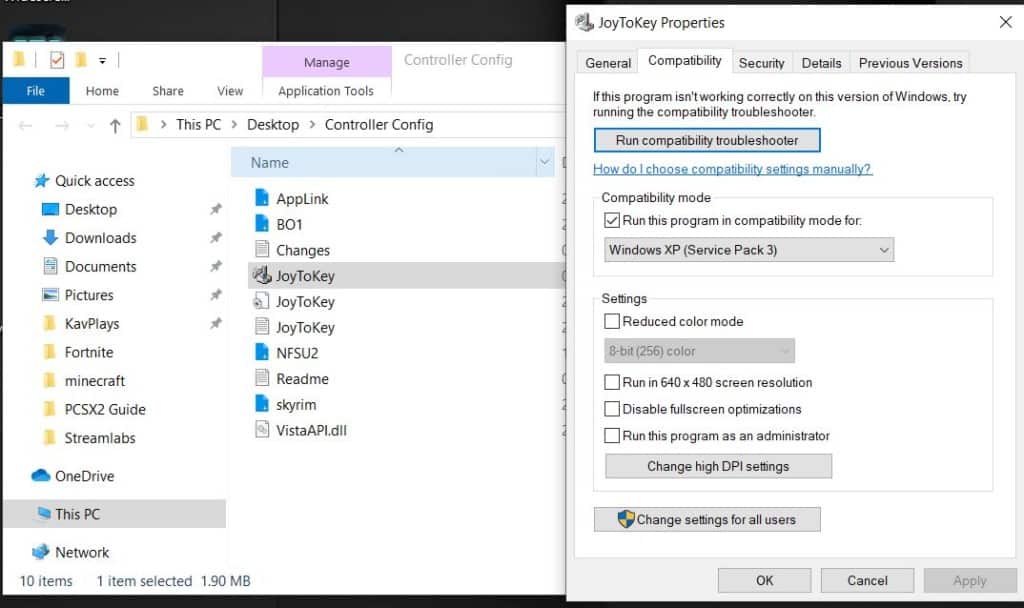
Change Compatibility Mode
The next step is to launch the JoyToKey app on your computer. However, before you do this. It is recommended to run JoyToKey in Compatibility Mode. This fixes some issues you may run into after you set it up.
To do this go to your JoyToKey root folder and find the joytokey.exe file. Right-click and select Properties. Go to the Compatibility mode tab and run the application in compatibility mode for Windows XP Service Pack 3. Click Apply to save.
Launch JoyToKey and Setup
To assign your keyboard buttons to your controller. Connect your controller to your computer via USB or Bluetooth.
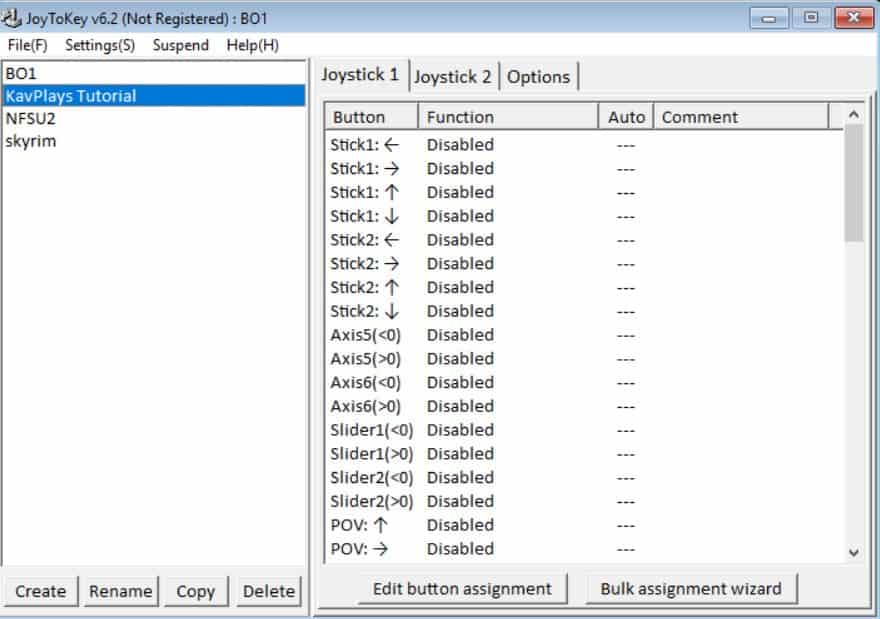
Create a New Profile
Launch the JoyToKey application. Here you will see the User Interface. The first thing to do is to create a new profile. You will see “Create” at the bottom left of the JoyTokey app. Name the profile and save.
Show all Axes
Next, go to the options menu to the right of joystick 2. Click it and under the show/hide buttons heading choose “show all axes” from the drop-down menu.
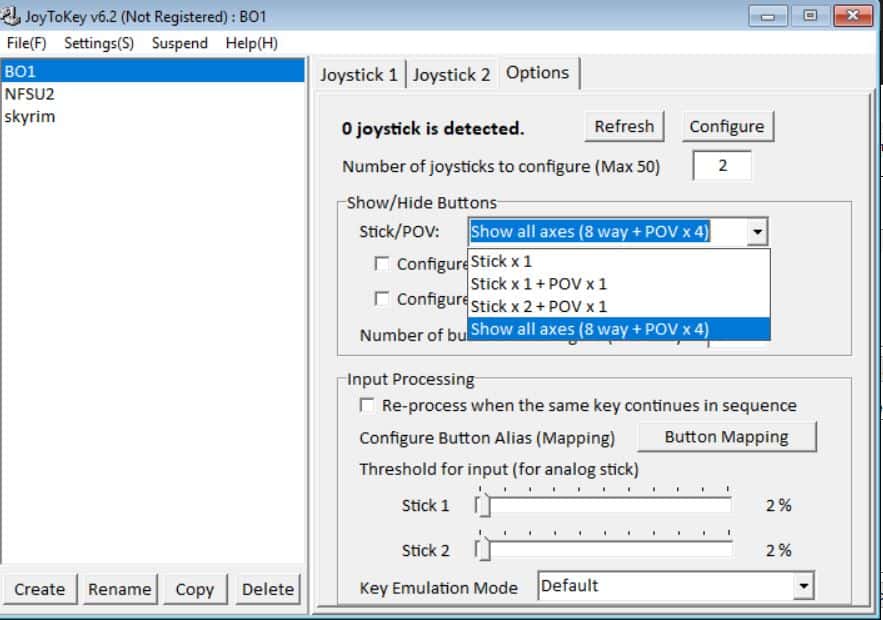
Now take your controller and start clicking buttons and moving the analog sticks. If the joystick functions start lighting up yellow. The controller is detected.
Assign the Buttons
To assign a controller button to a keyboard button simply press the button on the controller. The button should highlight in yellow on the JoyToKey app.
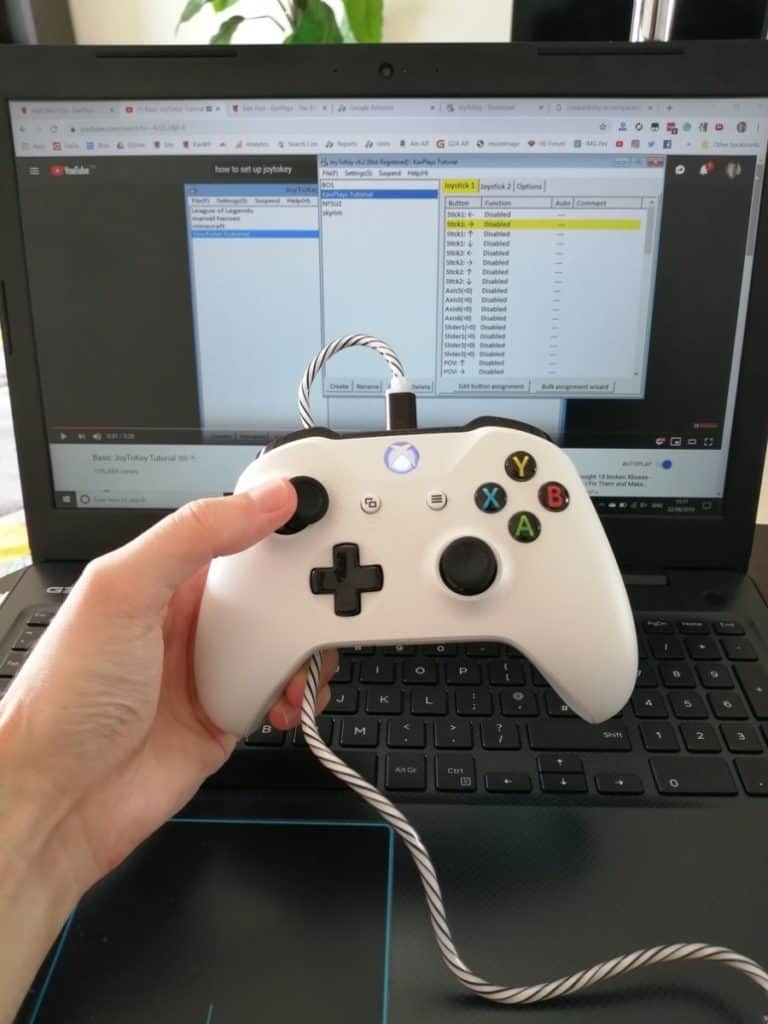
For example, here we assign the left analog stick on an Xbox One Controller. Push the analog stick to the right. You can see the JoyToKey has detected the movement. Now double click the button on the screen. Here you can choose a function for the button. Choose D. Now, right on the left analog stick is assigned to the D button on the keyboard.
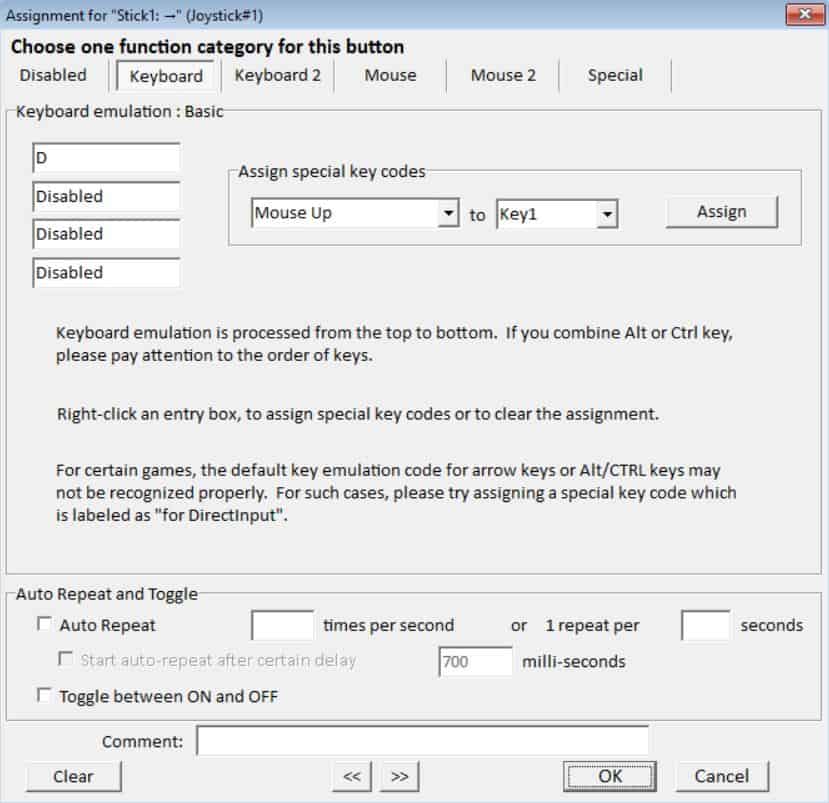
Repeat this simple process for the rest of the buttons you want to assign on your controller.
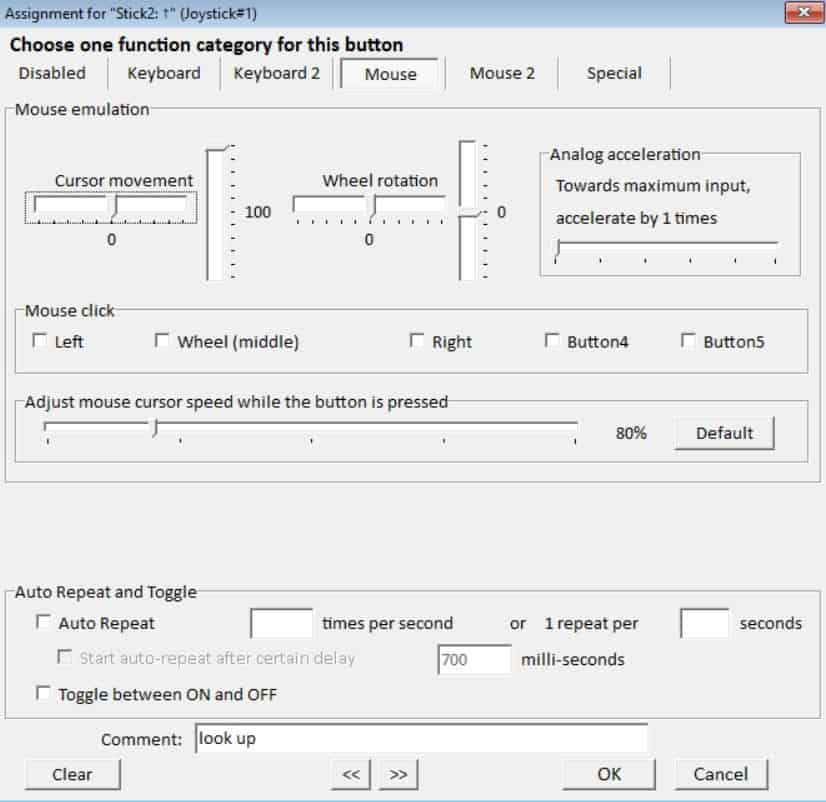
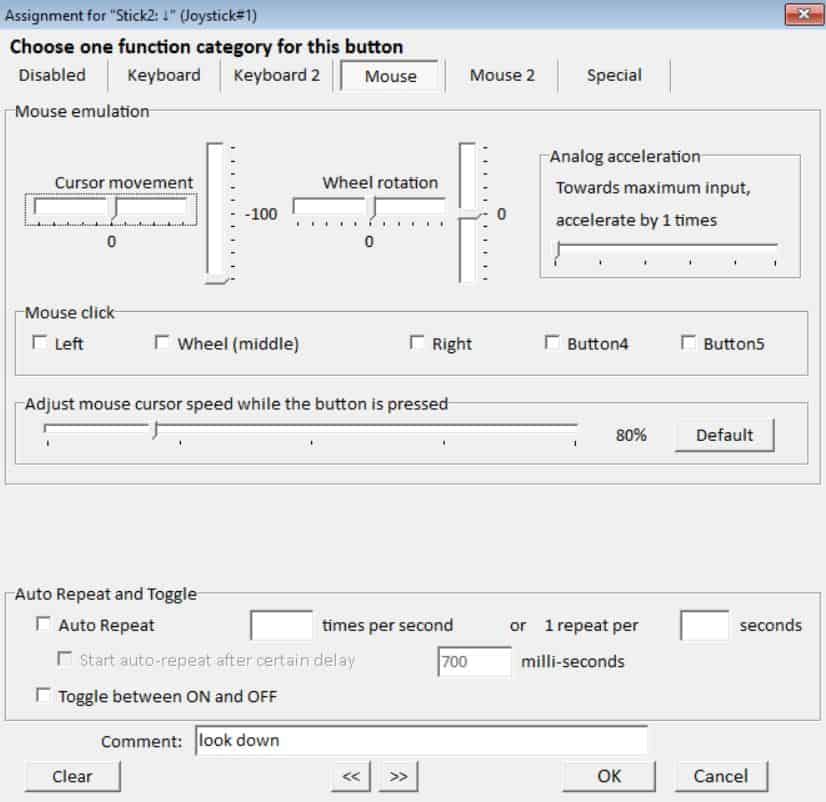
Assign the Mouse
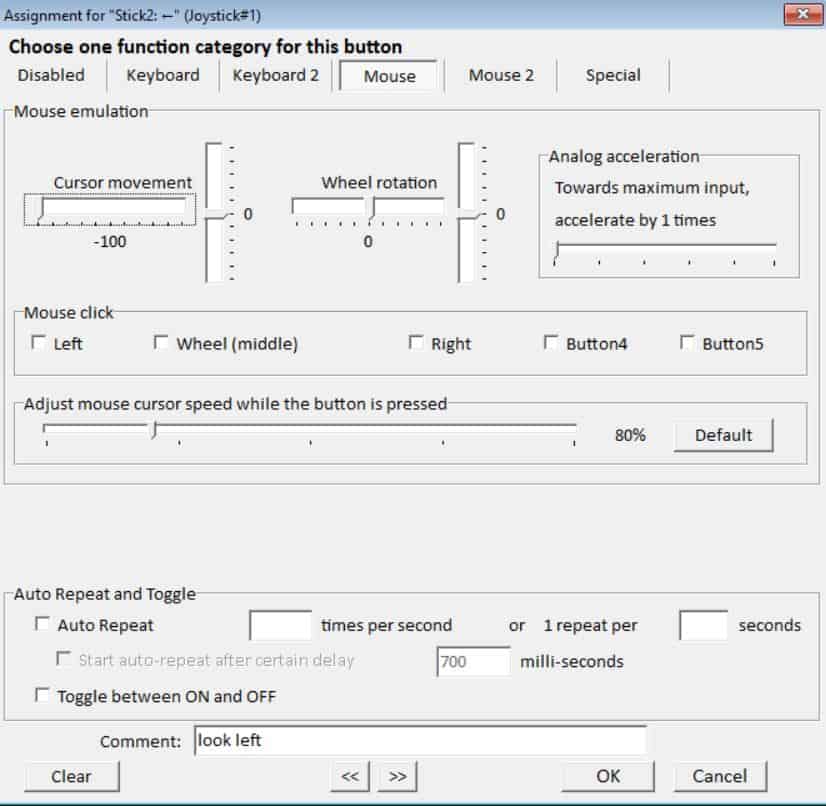
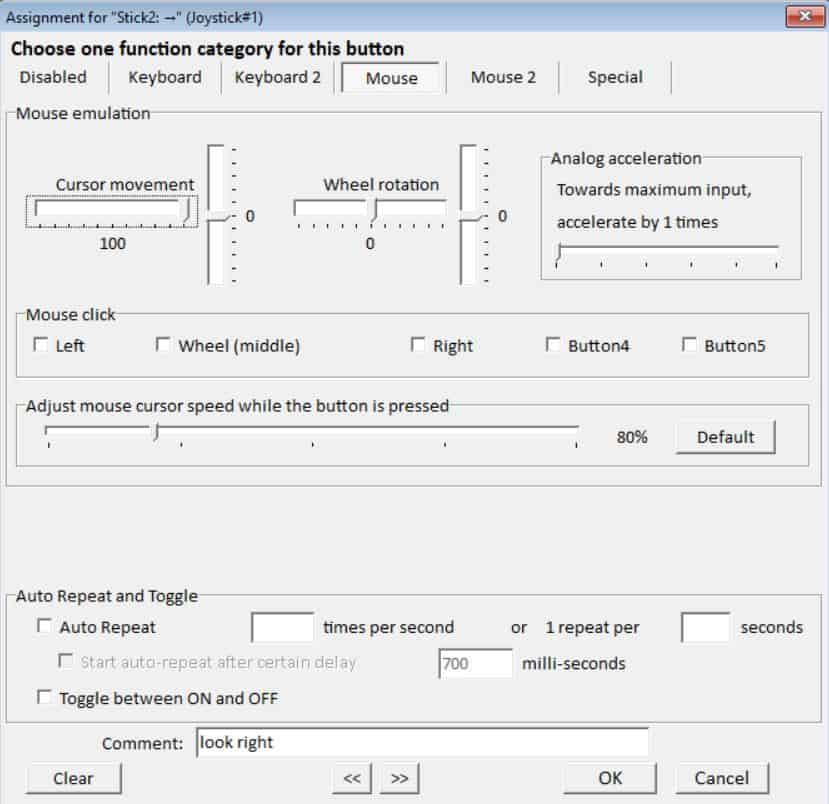
The final step is to assign the mouse to your directional analog stick. The analog stick you use to look around or aim in-game. Follow the same process as above. Move your right analog stick so JoyToKey can detect the button.
This time when you double click on the button to assign it. You go to the mouse tab at the top of the screen, not the keyboard tab.
Copy the following settings for a general guide. You may have to tweak these to fit your preference. For example, if the sensitivity is too low or high. You can change the “adjust mouse cursor speed while the button is pressed” function.
Mouse Left
Mouse Right
Mouse Down
Mouse Up