

DS4 for Windows is a nifty software that allows you to use your DS4 (DualShock 4) controller with your Windows computer. It’s like a bridge that brings the gaming goodness of the DS4 to your PC gaming adventures.
You see, the DS4 controller is designed primarily for PlayStation 4 consoles, but many folks love using it on their computers too. That’s where DS4 for Windows steps in. It’s a third-party program that enables seamless compatibility between your DS4 controller and Windows, so you can enjoy gaming with the controller you love.
With DS4 for Windows, you can connect your DS4 controller to your computer via a USB cable or even wirelessly through Bluetooth, if your computer supports it. Once connected, the software takes care of installing the necessary drivers and making sure your computer recognizes and communicates with the controller flawlessly.
Moreover, DS4 for Windows provides a user-friendly interface to tweak settings, remap buttons, and fine-tune controller sensitivity to suit your gaming style. It’s all about customizing the experience to make it just right for you.
So, whether you’re exploring vast virtual worlds or competing in intense battles, DS4 for Windows ensures that your DS4 controller becomes your trusty companion on your PC gaming journey.
If you liked this guide, check out more of our Emulation/Retro/Mods gaming guides.
How To Install DS4 For Windows
Before we begin, make sure you have the following:
- A DS4 controller: This is the physical PS4 controller itself.
- A USB cable: You’ll need a USB cable to connect the controller to your computer.
Now, let’s get started with the installation and setup process:
Step 1: Connect Controller to PC
Connect the DS4 controller to your computer using the USB cable. Plug one end of the cable into the controller’s USB port and the other into an available USB port on your computer.
Step 2: Drivers Install Automatically
Once the controller is connected, it may automatically install the necessary drivers on your computer. If this happens, you can skip to Step 3. However, if your computer doesn’t recognize the controller or prompts you to install the drivers manually, we’ll need to download them.
Step 3: Download DS4 Windows
Open your web browser and visit the official DS4Windows website. You can search for it using any search engine. DS4Windows is a third-party software that enables the DS4 controller to work on Windows computers. On the DS4Windows website, look for the download link or button. Click on it to start the download. Make sure to download the latest version available.
Step 4: Run DS4Windows and .NET Desktop Runtime
Once the download is complete, locate the downloaded file which should be a Zip folder. Open the folder using an extracting tool such as WinRAR or 7Zip. After opening the folder, place the DS4Windows folder in a location of your choice.
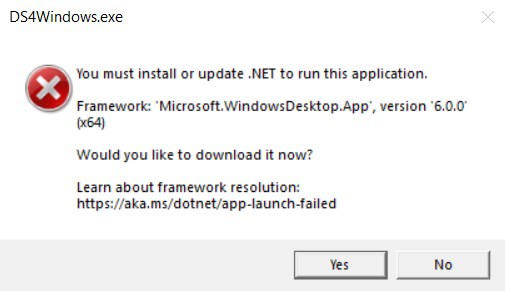
Next, run the installation program by clicking on the DS4Windows application. Upon doing this DS4Windows will prompt you to install .NET Desktop Runtime. Select OK and it will automatically download .NET. Run the windowsdesktopruntime.exe to install. It takes about 5 seconds to install.
Step 5: Launch DS4 Windows and Configure Save Settings
After the installation of .NET Desktop Runtime is complete, relaunch the DS4Windows application. You may be prompted to choose a location to save settings. You can select a programs folder if you want a portable install or the appdata option if you only intend on using DS4 on one computer.
Step 6: Install ViDEmBus and HidHide Driver
Next, DS4Windows will open a configuration window and provide links to download some necessary and optional drivers. The ViGEmBus driver is a required driver. We also recommend installing the HidHide Driver. This will stop a known issue that can cause controllers to double input.
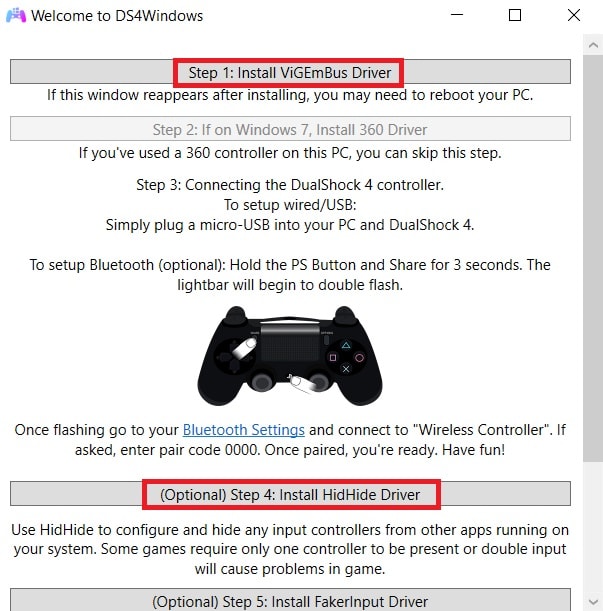
After both drivers are installed, reboot your PC.
Step 7: Launch DS4 and Explore Settings
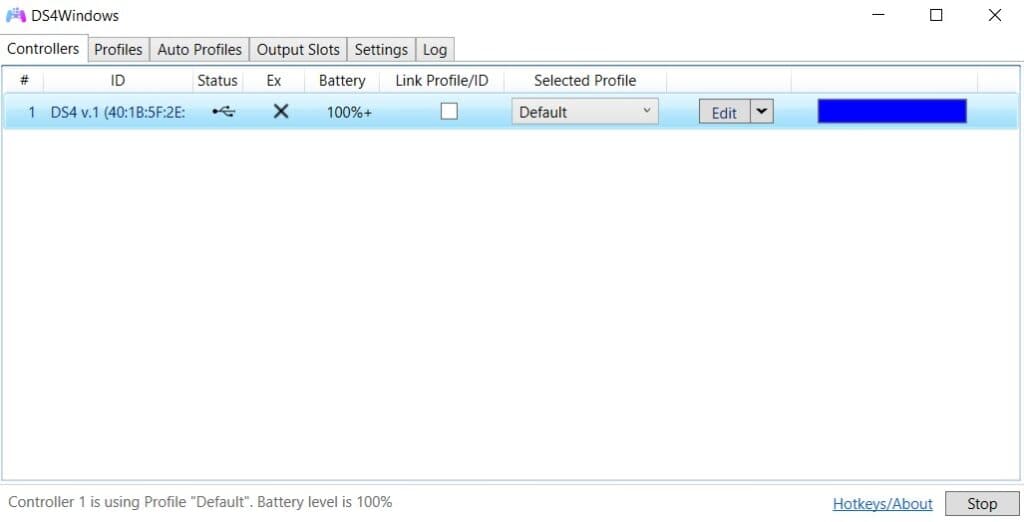
After you reboot your PC, launch DS4 again and you will be presented with the user Interface. Your picture should look similar to the image below:
If you intend to use the DS4 wirelessly via Bluetooth, ensure your computer has a Bluetooth adapter and select the corresponding option.
At this point, you can customize the DS4 controller’s settings to your liking. In the DS4Windows configuration window, you’ll find various options to remap buttons, adjust sensitivity, and configure other controller settings.
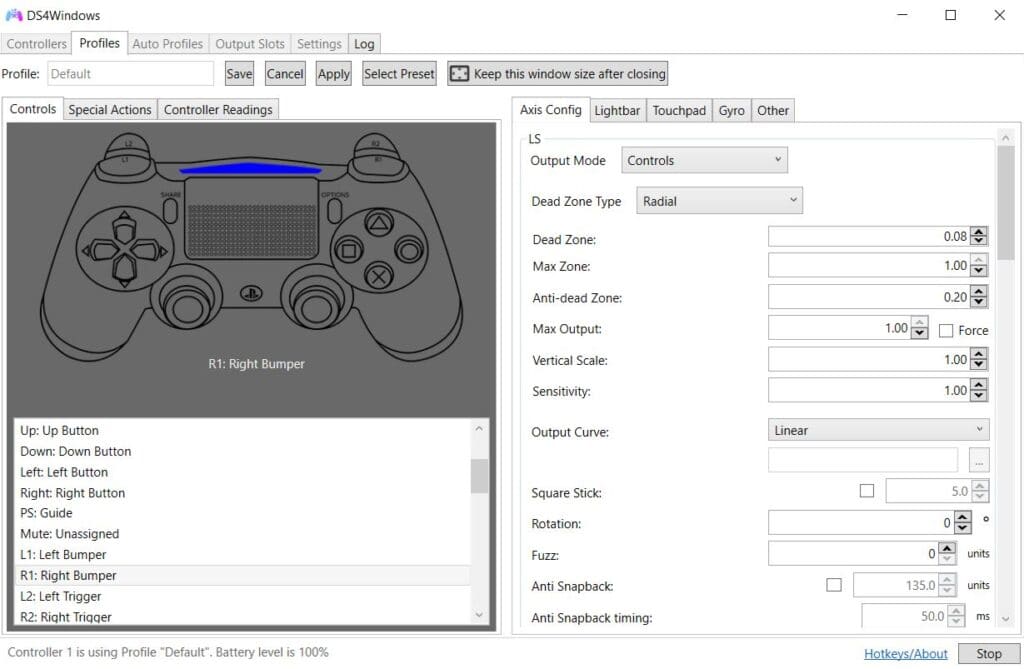
Feel free to explore these options and make any desired changes. You can change and remap the buttons by selecting “Edit”. See the picture below.
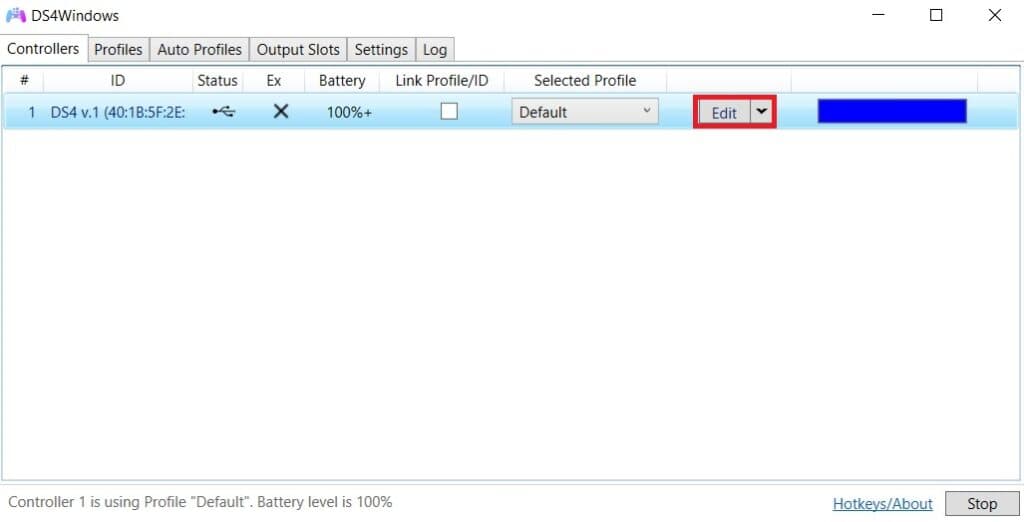
After you select Edit you will be presented with a screen to remap the buttons and change the lightbar color as well as other things. If you change anything, make sure to always hit “Save”.
That’s it! You have successfully installed and set up your DS4 controller on your computer. You can now use it to play games or navigate your computer’s interface.
DS4 Related Questions
Is DS4 free?
Yes, DS4 is a free PS4 controller emulation software.
Is DS4 Safe?
DS4 is entirely safe and free from malware and viruses. Just make sure you download it from the official website.