
RPCS3 is an awesome project that we’ve been experimenting a lot with lately. If you just discovered it and are wondering how to install RPCS3, you’ve come to the right place.
Our guide below takes you step by step through how to set up the emulator and the default settings you will need to configure. However, you’ll find that individual games require different settings in order to work so this guide will give a general configuration.
It’s best to mess around with the settings yourself and learn them as you go along. We discovered RPCS3 a while ago and are loving it so far.
It’s a fantastic software that allows you to play PlayStation 3 games on your computer. It’s like having a PS3 console right on your PC but with added benefits like improved graphics, customizable settings, and the convenience of playing on your computer screen.
Imagine being able to relive your favorite PS3 games, even if you no longer have a physical PS3 console or want to avoid the hassle of setting it up. RPCS3 comes to the rescue by emulating the PS3 system, meaning it replicates the PS3’s hardware and software behavior, allowing you to enjoy those beloved games on modern hardware.
The emulator’s name, RPCS3, is a combination of “RPC” and “S3.” “RPC” stands for “Remote Procedure Call,” which is a concept in computer science that refers to a way for different software programs to communicate with each other. In this case, RPCS3 acts as a mediator between the PS3 game and your computer, making it possible to run PS3 games on your PC smoothly.
The number “3” in the name RPCS3 represents the third generation of the PlayStation console. As you may know, PlayStation 3 was a popular gaming console released by Sony back in 2006. RPCS3 is the result of dedicated developers’ hard work, aiming to provide gamers with a reliable and enjoyable PS3 gaming experience on their computers.
One of the remarkable things about RPCS3 is its open-source nature. This means that anyone can view, modify, and contribute to its source code, making it a collaborative project with a vibrant community. The developers and contributors continuously work to improve the emulator, adding features, enhancing compatibility with games, and refining performance.
By using RPCS3, you can play a wide range of PS3 games on your PC, from action-packed adventures and immersive role-playing games to thrilling racing titles and everything in between. Just make sure to have the game files, commonly known as ISOs or ROMs, which you legally own or have created backups for.
RPCS3 not only lets you experience PS3 games with enhanced graphics and resolution but also allows you to customize various settings to suit your preferences. You can adjust things like resolution, graphics quality, controller configurations, and more, giving you the flexibility to optimize your gaming experience based on your computer’s capabilities and your personal preferences.
While RPCS3 has made tremendous progress in emulating PS3 games, it’s essential to note that not all games are perfectly compatible. Due to the complexity of the PS3 architecture and the various game-specific nuances, some games may not work correctly or may have performance issues. However, the RPCS3 community is actively working on improving compatibility and ironing out any remaining bugs.
If you like this Emulation guide, check out our other Retro Gaming, Emulation and modding guides while youre here.
How To Install RPCS3 – Step By Step
RPCS3 is a PlayStation 3 emulator that allows you to play PS3 games on your computer. Let’s go through the steps together:
Step 1: Check System Requirements
Before installing RPCS3, make sure your computer meets the system requirements. You’ll need a reasonably powerful system with a modern CPU, a dedicated GPU with OpenGL 4.3 support, and at least 4GB of RAM.
The specs mentioned above are the minimum requirements. However, we recommend at least 8GB of RAM, a 8-core CPU, and a GPU that is Vulkan-compatible.
Step 2: Download RPCS3
To get started, visit the official RPCS3 website at rpcs3.net. On the homepage, you’ll find a “Download” button. Click on it to go to the download page.
Here, you’ll see various versions of RPCS3 available for different operating systems (Windows, Linux, and macOS). Choose the appropriate version for your system and click on the download link.
You may also need to download Microsoft Visual C++ 2019 Redistributable if you don’t have it already. Download the ARM64 version.
Step 3: Install RPCS3
Once the download is complete, locate the downloaded file and extract it using an extraction tool such as 7Zip or WinRAR. When it is extracted, run the RPCS3 installer.
Follow the on-screen instructions to install RPCS3 on your computer. The installation process is straightforward and shouldn’t take much time. All you do is accept the terms and click “ok”.
Step 4: Set Up RPCS3
After the installation, it’s time to set up RPCS3. Launch the RPCS3 application. Initially, you’ll be prompted to set up the emulator’s configuration. Don’t worry; we’ll guide you through this process.
Step 5: Firmware Installation
RPCS3 requires a copy of the PlayStation 3 firmware to function correctly. You can download the firmware from the official PlayStation website or extract it from your own PS3 console.
From the PlayStation website
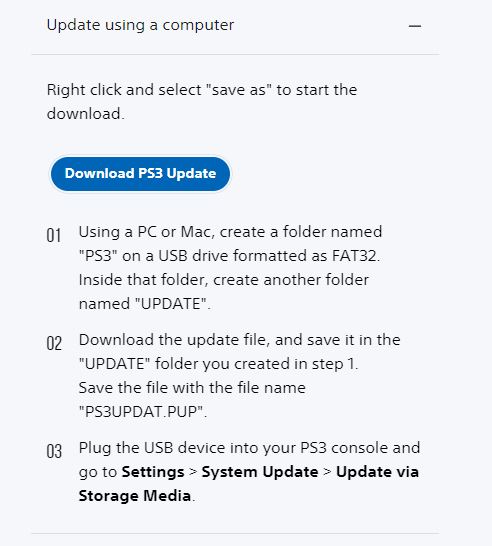
Once you have the firmware, click on the “File” menu in RPCS3 and select “Install Firmware.” Browse to the location where you saved the firmware file and select it. RPCS3 will install the firmware, and you’ll be ready to proceed.
Step 6: Game Setup
To play PS3 games on RPCS3, you’ll need game files, commonly referred to as “ISOs” or “ROMs.” It’s important to note that downloading copyrighted game files from unofficial sources is illegal and against game developers’ use case policy. Therefore, make sure you own the games you want to play and create backup copies of the discs you own.
Once you have the game files, click on the “File” menu in RPCS3 and select “Add Games.” Browse to the location where you stored your game files and select the appropriate file
We suggest making a folder called PS3 Games and putting all your PS3 games in it to keep things organized.
How To Organize and Setup ISOs for RPCS3
Part of this step requires you to know how to set up the game folders when using RPCS3. It’s not as easy as just dropping the ISO into the application. Follow the steps below to setup games in RPCS3:
If you have an ISO file and have never opened one on your computer before. Go to the ISO file and right-click it, then select “open with” and use Windows Explorer.
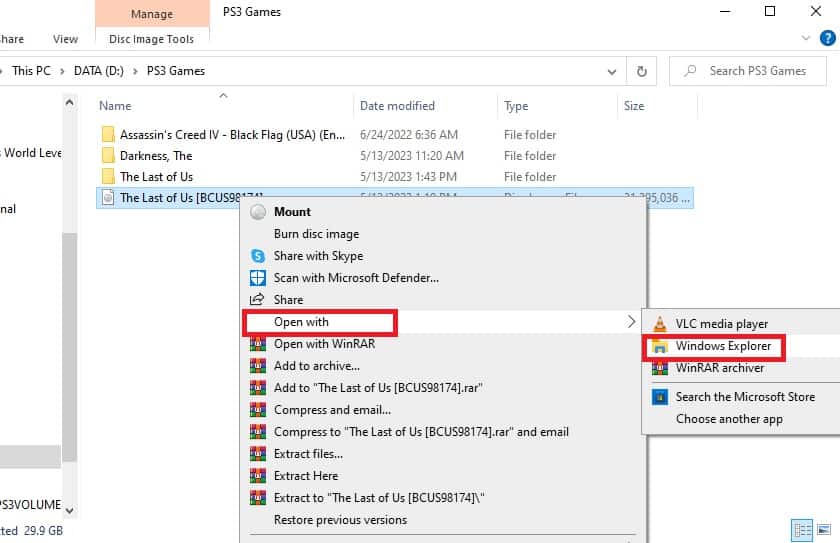
After you open the ISO file. Create a new Folder in your PS3 Games Folder for the chosen game you’re extracting.
In the picture below you can see the process. In the PS3 Games, we have created a “The Last of Us” folder and we’ve moved the ISO files into this folder.
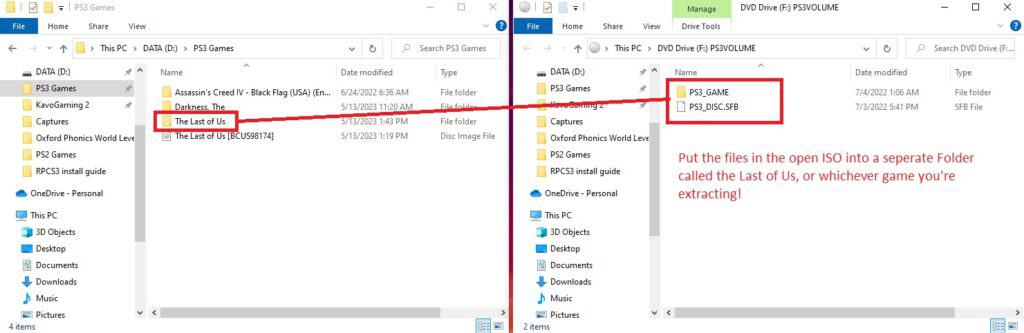
Now that your game is extracted into the correct folder. The next step is to go to the RPCS3 application and select “File”, then select “Add Games”, then select the folder you have your PS3 games in. RPCS3 will scan the folder and set up the games in the application.
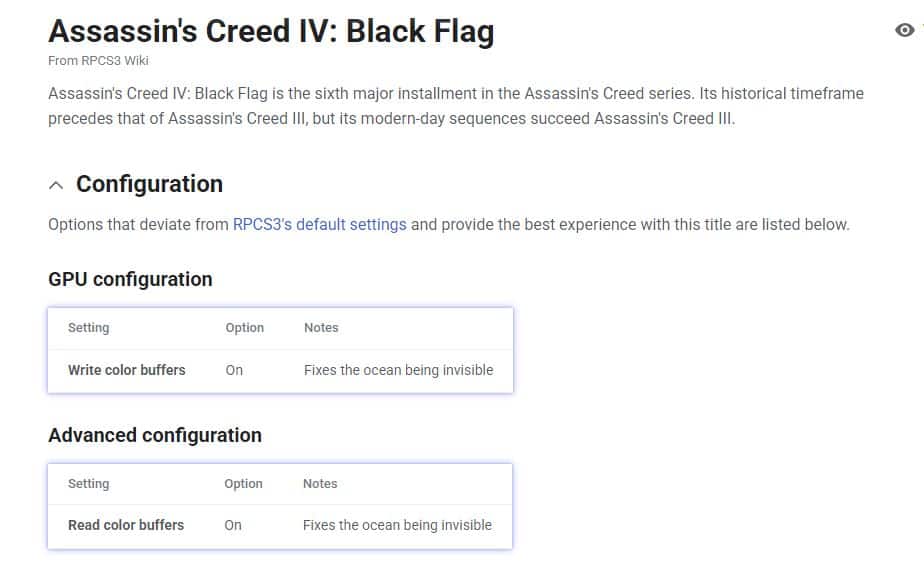
Step 7: Configuring Game Settings
Each game may require specific settings to run optimally in RPCS3. You can tweak these settings by clicking on the game from within RPCS3 and selecting “Change Custom Configuration”. Here, you can adjust various options such as resolution, graphics settings, CPU and GPU settings, and more.
To check the latest configuration settings for the game you want to play. Right-click on the game and select “Check Game Compatability”. You will be taken to a compatibility page for that game.
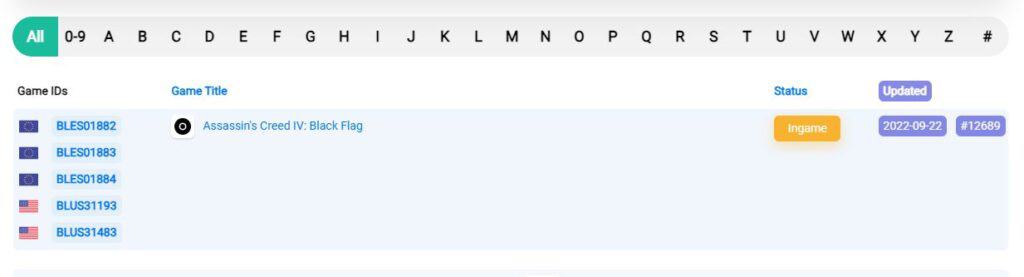
Click on the game and this will take you to the RPCS3 wiki page with the game’s configuration settings.
Step 8: Setup Controllers
To configure your controller, first, make sure you have your controller plugged into the PC via USB.
From the RPCS3 menu, go to Configuration – Pads. You will then be greeted with the gamepad layout.
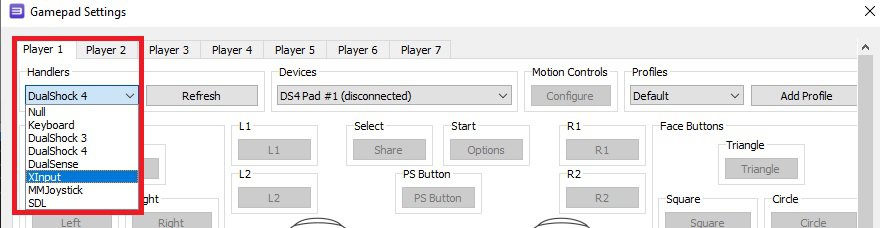
In the top left of the screen you will see a setting called “Handlers”, click on the drop-down menu and you will see a list of gamepads. XInput is for Xbox controllers. Select which layout you want and then hit “Save”.
Step 9: Playing Games
Once you’ve configured the settings, you’re ready to play! Click on the “File” menu and select “Boot Game” again. RPCS3 will load the game, and you can start enjoying your PS3 game on your computer.
Remember, not all games are perfectly compatible with RPCS3, as it’s an ongoing project. Some games may not work correctly or may have performance issues. Checking the RPCS3 compatibility list, available on their website and forums, can help you find information about the status of specific games.
That’s it! You’ve successfully installed and set up RPCS3 on your computer. Have fun exploring and playing PlayStation 3 games using the emulator.