
Wondering what the best class setups and attachments are for the RAM-7 Assault Rifle in Modern Warfare?
You have come to the right guide. We go through important statistics such as damage, rate of fire and recoil. With these stats, we give an overview of the best attachments to use on the RAM-7 AR.
Finally, we give our top 3 class setups to run on the RAM-7. Each class set up takes into account a variety of play styles so there is something to suit everyone.
Weapon background
The RAM-7 is the first of its kind in the Call of Duty franchise. However, we have seen bullpup assault rifles in the past such as the AUG and FAMAS. To compare previous COD weapons to the RAM-7. It is most like the MTAR from Call of Duty Black Ops II or the TAR-21 from MW2.
Players can unlock the RAM-7 after reaching level 31 of the Battle Pass.
The other Battle Pass weapon is the Holger-26, unlocked at level 15 of the battle pass. We also have a guide on the Holger-26. We love this guide, we even show you how to convert the Holger into the G36C MW classic AR.
Stats
- Damage: 23-18
- Rate of Fire: Moderate
- Recoil: 882RPM (kicks up and to the left).
From the weapon statistics above we can see that the RAM 7 will take out enemy players in 4 to 6 shots. The 4 shot kill range is limited to close range engagements. The 5 to 6 shot kill range is limited to medium to long-range.
Best Attachments
The best attachments for the RAM-7 in Modern Warfare are the:
- Commando Foregrip
- Stippled Grip Tape
- G.I. Mini Reflex
The first two attachments combined will drastically increase your sprint out time and ADS.
As for the other attachments, it depends on what you want to use the weapon for. However, if you find the iron sights are annoying, we recommend attaching a scope.
We swear by the G.I. Mini Reflex as the best run and gun scope in the game.
Class 1 – RAM-7 Free For All
This RAM-7 class is geared towards getting those high killstreaks. The RAM-7 is loaded with the FTAC 13.5 inch Compact Barrel, Tac Laser, XRX Ultralight Hollow, Commando Foregrip, and the Stippled Grip Tape.
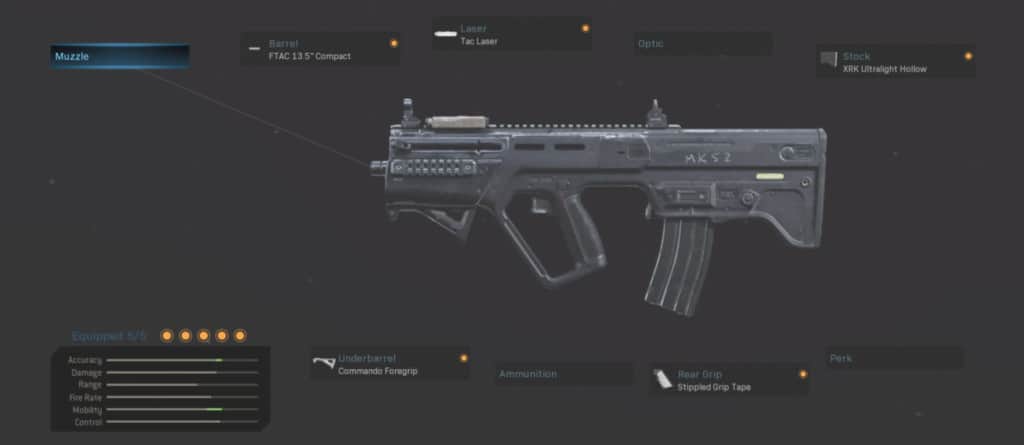
Class Setup
The rest of the class is built for maximizing ammo and equipment.
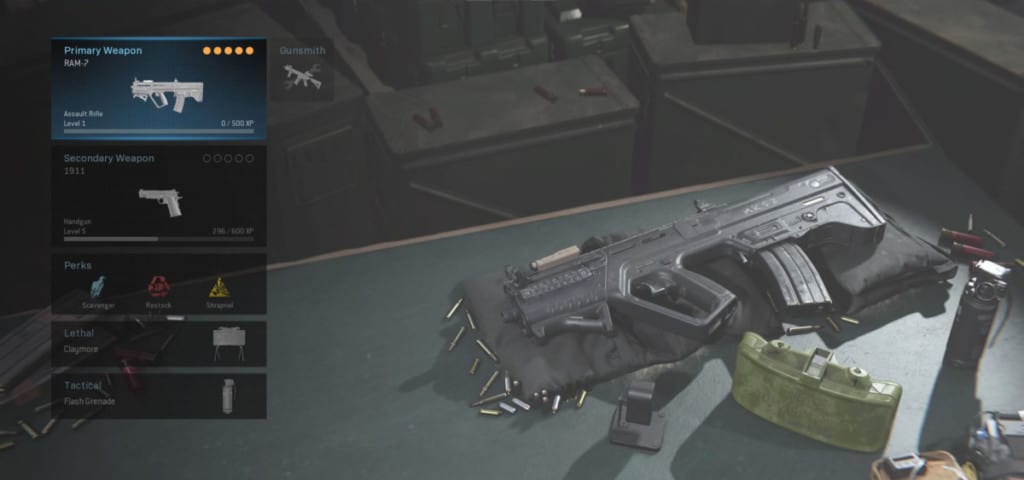
- Secondary: The 1911 as secondary.
- Perk 1: Scavenger to keep ammo flowing.
- Perk 2: Restock is great, you should use it more. It is especially good for game modes such as FFA.
- Perk 3: Shrapnel is great for holding down areas of the map with lethals.
- Lethal: 2 Claymores.
- Tactical: Flash grenade to blind enemies from their spawn.
Class 2 – RAM-7 Run & Gun
This class is great for the rushers out there. The RAM-7 is kitted with the Compensator, 13.8-inch Compact barrel, G.I. Mini Reflex, Commando Foregrip, and the Stippled Grip Tape.
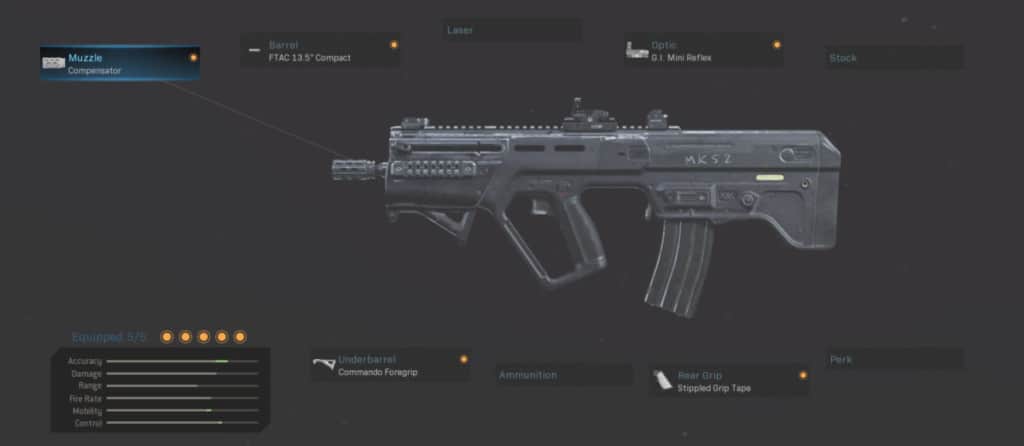
Class Setup
The rest of the class is built for speed and stealth.
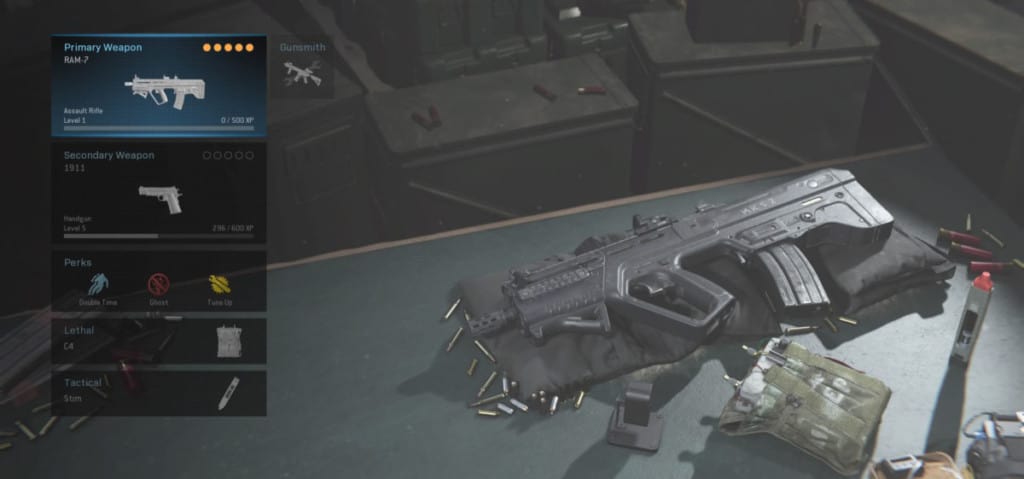
- Secondary: The 1911 is a reliable secondary.
- Perk 1: Double Time for longer sprint times.
- Perk 2: Ghost for added stealth.
- Perk 3: Tune-Up to charge your Field Upgrades faster. Use Dead Silence on this class setup.
- Lethal: C4’s are great against campers and riot shields.
- Tactical: The Stim shot is a must for all rushers.
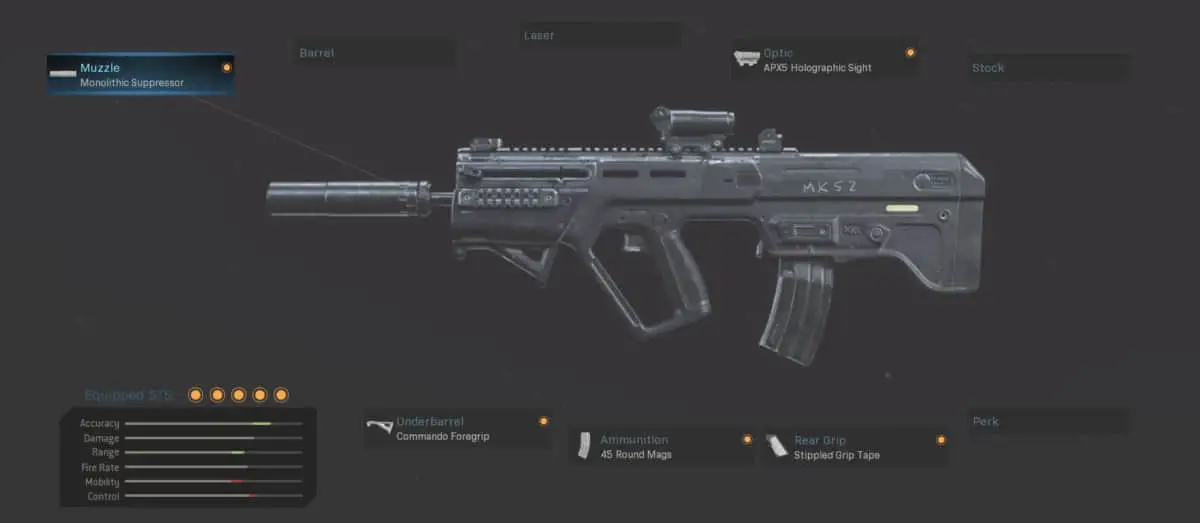
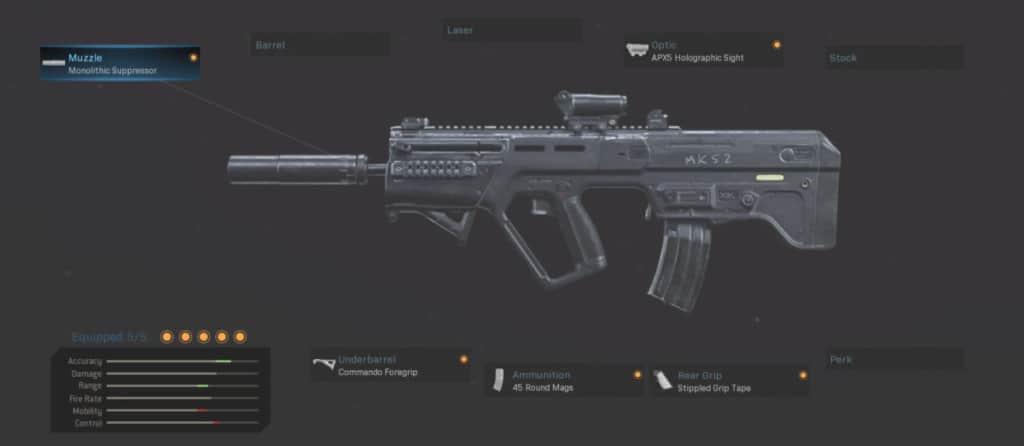
Class 3 – RAM-7 Objective
The final RAM-7 class is built for objective game modes such as Hardpoint and Domination. The RAM-7 is fitted with the Monolithic Suppressor, APX5 Holo Sight, Commando Foregrip, 45 Round Mags, and the Stippled Grip Tape.
Class Setup
The remainder of the class can be suitable as an all-rounder aswel as objective modes.
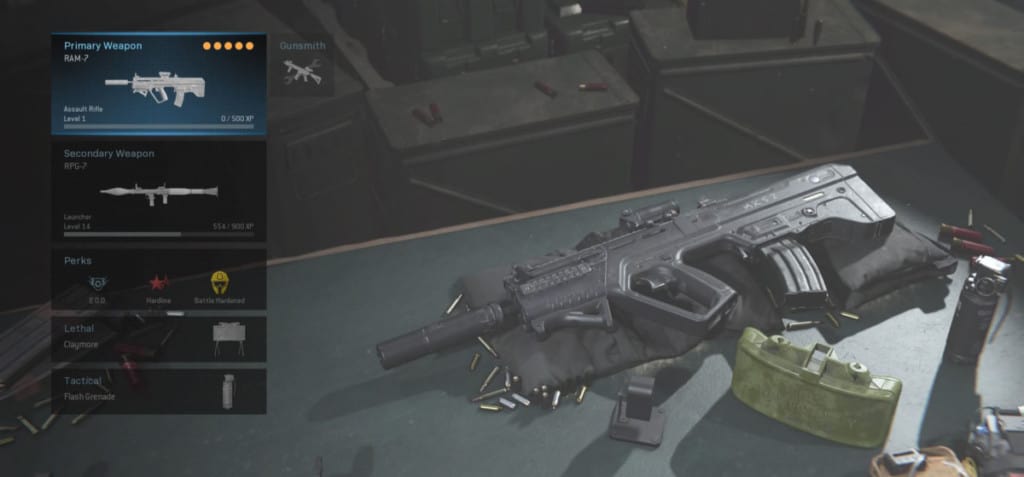
- Secondary: The RPG is so much fun and great for clearing flags in Domination.
- Perk 1: E.O.D. protects you from enemy explosives.
- Perk 2: Hardline is great when going for killstreaks.
- Perk 3: Battle-Hardened is essential if you’re going to be hanging around the objective.
- Lethal: Plant a Claymore on the objective or on a flank route.
- Tactical: Remeber to always flash the OBJ before attacking.