

Are you looking for the best class setups and attachments for the M91 Light Machine Gun in Modern Warfare?
This guide takes a look at the M91 in-depth and reviews the weapon statistics such as damage range, rate of fire and recoil. With this information, we then give you our top recommended attachments to run on the M91.
Finally, we give our best 3 class setups to use on the M91. Each class setup caters to different play styles so there is something for everyone.
Weapon background
The M91 is the first of its kind in Call of Duty, at least under the name of M91. It is very similar in appearance to the LSAT from Black Ops 2, which was a fan favorite among those that love LMGs.
Stats
- Damage: 34-30
- Rate of Fire: 666 RPM
- Recoil: Strong(Up and to the left)
Looking at the above weapon statistics we determine that the M91 can kill in 3 to 4 shots. In close range, the weapon will wipe an enemy player out in 3 shots. Medium to long-range, the weapon will take 4 shots to kill.
Make sure to aim for the chest area because hitting enemies in the limbs makes the weapon drop down to 5 or more shots to kill.
Best Attachments
The best attachments for the M91 in Modern Warfare are the:
- Commando Foregrip
- Stippled Grip Tape
- Tac Laser
- Optic of players choice
Like all LMGs, the ADS and Sprint out times are very slow. For these reasons, the best attachments for the M91 in Modern Warfare are the Commando Foregrip and the Stippled Grip Tape. You can also use the Tac Laser to further speed up these times.
We would also recommend an optic of your choice. For close to medium range we recommend either the Solozero Reflex or the G.I. Mini Reflex. For longer-range engagements, use a 3x or bigger scope.
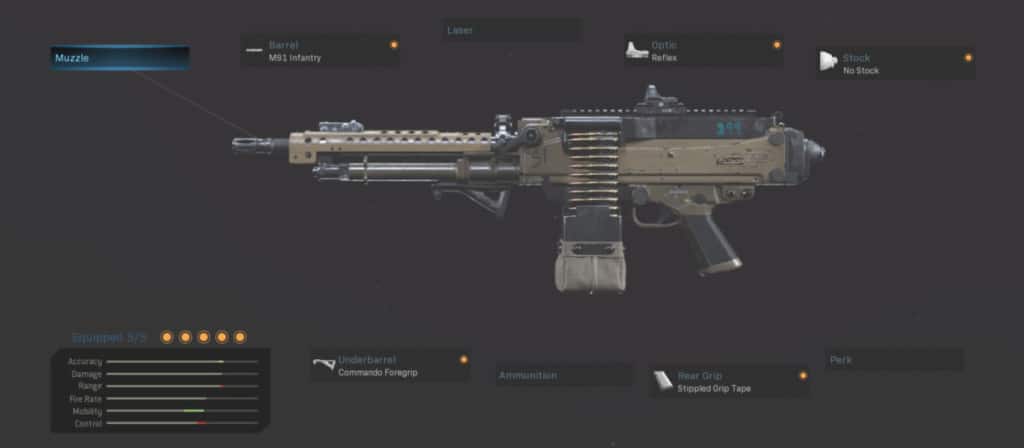
Class 1 – M91 Run and Gun
This M91 class is made for the rushers out there. The M91 comes fitted with the M91 Infantry barrel, the Solozero Optic, No Stock, Commando Foregrip, and the Stippled Grip Tape.
Class Setup
The rest of the class is built for speed and aggression.
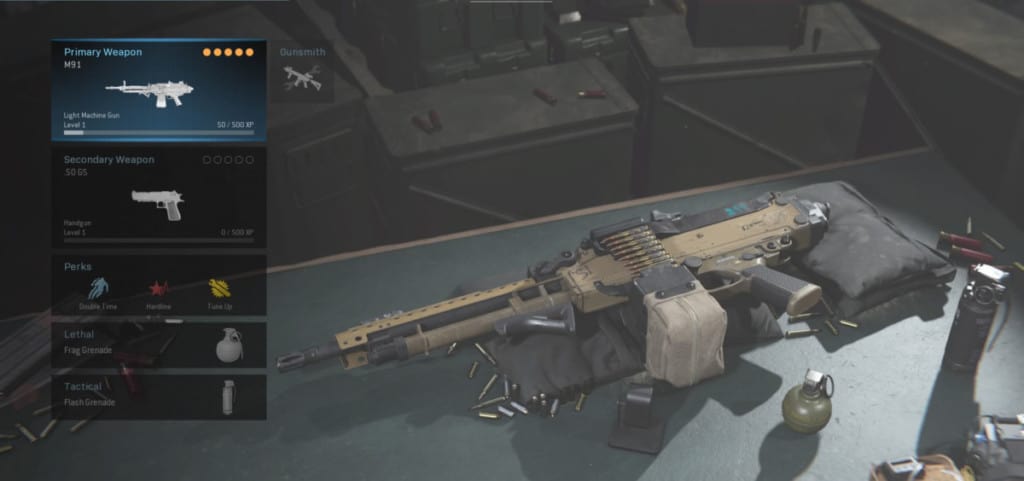
- Secondary: The Deagle is a hand cannon.
- Perk 1: Double Time allows you longer double sprint, making you faster.
- Perk 2: Hardline rewards you killstreaks in one less kill.
- Perk 3: Tune-up charges your Field Upgrades much quicker. Use Dead Silence.
- Lethal: The Frag is great for catching people running flank routes or people coming out of their spawn.
- Tactical: Before you chuck the grenade, use your flash first.
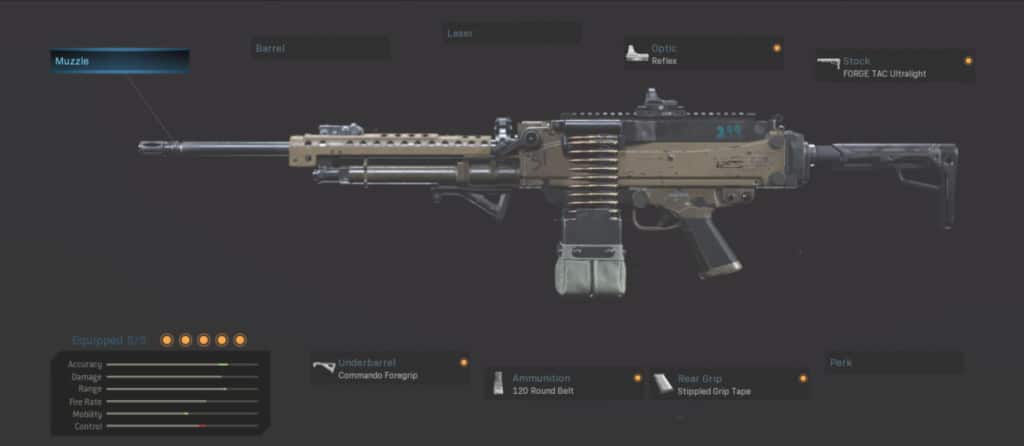
Class 2 – M91 Demolition
The M91 Demolition class is great for all-out warfare and destruction. The M91 is fitted with a Reflex of your choice. The FORGE TAC Ultralight, Commando Foregrip, 120 Round Bolt, and the Stippled Grip Tape.
Class Setup
The remainder fo the class is built for utter destruction.
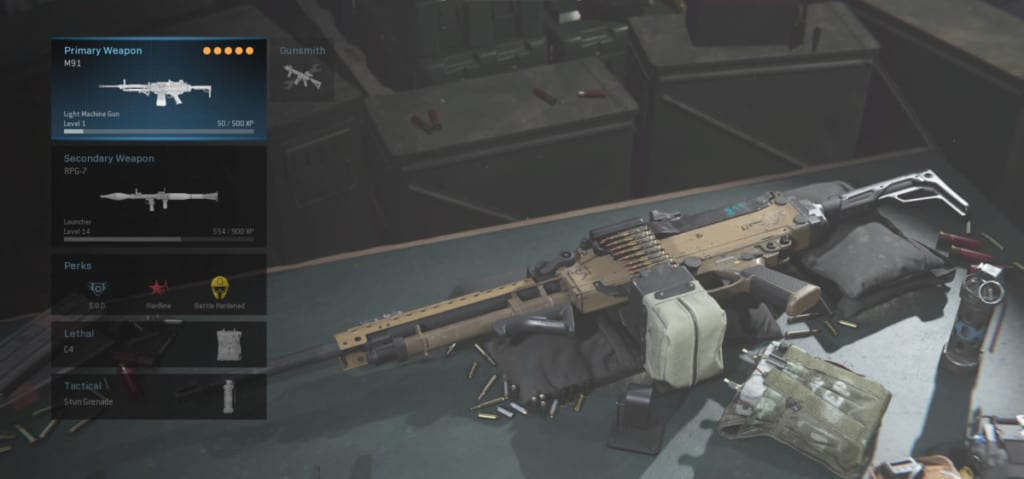
- Secondary: The RPG as a secondary works great when clearing objectives or campers in rooms.
- Perk 1: E.O.D. keeps you protected from enemy lethals.
- Perk 2: Hardline grants you killstreaks in one less kill. We suggest running offensive streaks, such as the Cluster Strike, Wheelson or VTOL.
- Perk 3: Battle-Hardened will shield you from enemy tactical equipment, at least a little bit.
- Lethal: A C4 is essential for an all-out demolition class.
- Tactical: Use your stuns as much as you can.
Class 3 – M91 Groundwar
The final M91 class is great for Groundwar players. The M91 comes fitted with the M91 Heavy barrel, Merc Thermal Optic, Ranger, Foregrip, Stippled Grip Tape and Recon Perk.
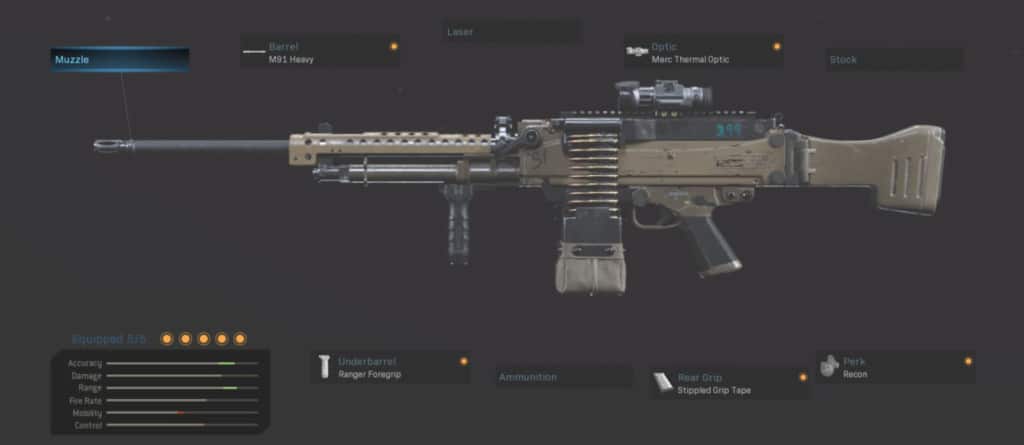
Class Setup
The remainder of the class takes into account the bigger maps in Groundwar.
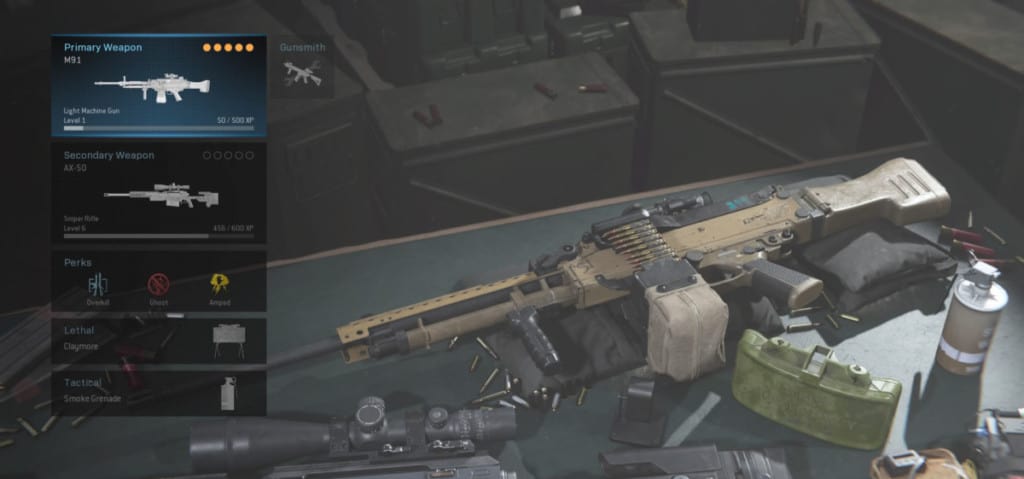
- Secondary: The AX-50 Sniper Rifle as secondary.
- Perk 1: Overkill lets you have a primary weapon in your secondary slot.
- Perk 2: Ghost to keep you off the enemy radar. This is particularly important in Groundwar.
- Perk 3: Amped allows you to quickly switch to your sniper rifle if you need to pick someone off from a distance.
- Lethal: The Claymore makes it much easier to block off a flank route or doorway.
- Tactical: Use the Smoke Grenade if you come under heavy fire and need to disappear fast.