
You want those nostalgic feelings back! You haven’t played a PS2 game in years. You’ve probably sold your PS2 or chucked it out a long time ago. You miss playing the classics like Tekken 5, God of War, and San Andreas.
Luckily for you, you don’t have to buy a PS2 again and go scavenging the internet for old PS2 discs. Queue the PCSX2, the PS2 emulator. It allows you to play almost any PS2 game from your PC. This guide will take you through how to download and set up PCSX2 and install games.
Setting up the PCSX2 emulator requires several steps, including downloading the necessary files, configuring the emulator, and obtaining a PlayStation 2 BIOS. Here’s a detailed guide on how to set up PCSX2.
How To Install PCSX2
Step 1: System Requirements
Ensure that your computer meets the minimum system requirements to run PCSX2 smoothly. The requirements may vary depending on the version of PCSX2 and the games you want to play.
However, here are the recommended minimum specifications:
- Windows 7 or later, or a compatible Linux distribution.
- Intel Core 2 Duo processor or equivalent.
- 2 GB of RAM.
- A dedicated graphics card with at least 512 MB of VRAM.
- DirectX 11 or later.
- A PlayStation 2 controller or a compatible gamepad.
Above are the minimum requirements. However, we recommend at least an i5 processor with 6GB of RAM or AMD equivalent.
We’ve run PCSX2 on an i7 laptop with a 1050Ti GPU and it needed to always be plugged in to hold the frames. Emulation is a hog on the CPU and overall system.
Step 2: Download PCSX2
Visit the official PCSX2 website at https://pcsx2.net/ and navigate to the “Downloads” section. Download the latest nightly version of PCSX2 for your operating system. Downloading the Nightly version ensures you get the latest build when it releases. You can also check for updates from inside the PCSX2 user interface.
Step 3: Install PCSX2
You will need a ZIP extractor tool to unzip the folder. Make sure to unzip the folder into its own folder named PCSX2 to ensure all the correct folders and files are in the right place.
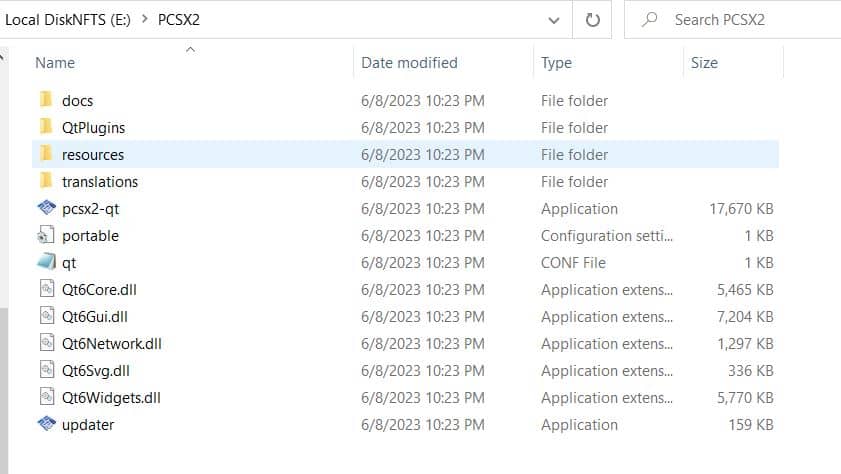
After everything is extracted. Launch the PCSX2-qt exe and the application should launch with no installation process required.
Once you launch the application for the first time you should have more folders in your PCSX2 main folder including a folder called bios. Move on to step 4.

Step 4: Obtain PlayStation 2 BIOS
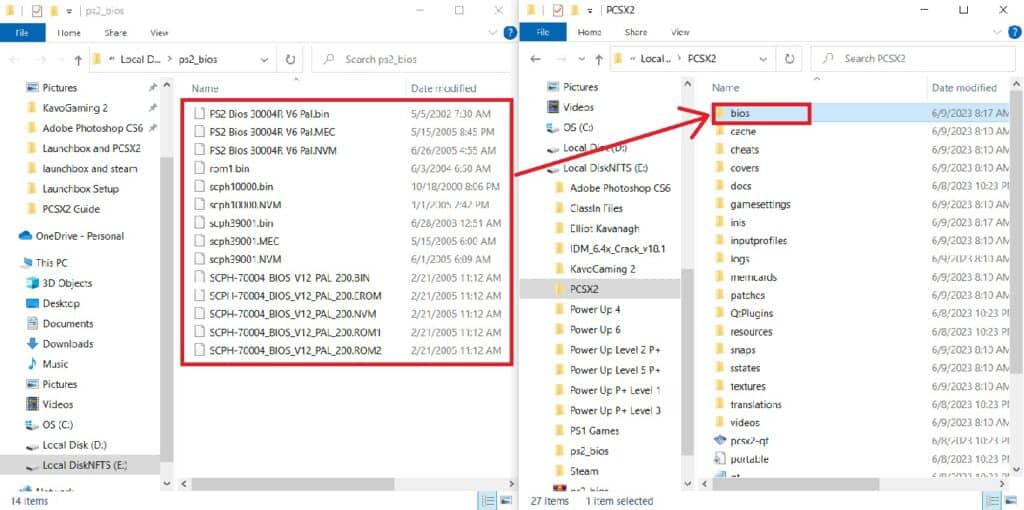
PlayStation 2 BIOS is required to run PCSX2. You’ll need to provide your own BIOS file, as downloading or distributing the BIOS is illegal and against copyright laws. If you own a PlayStation 2, you can extract the BIOS from your console.
Alternatively, you can search online for instructions on acquiring the BIOS file. There are tons of ROM sites available if you search them up.
Romsmania.gg tends to be a good source. However, these sites are changed or taken down a lot so look around yourself and you should find them quite easily.
Once you have the BIOS file, place it in the “bios” folder inside the PCSX2 installation directory. The BIOS file should be named “SCPH-XXXXX.bin,” where “XXXXX” represents the region code of your BIOS.
Step 5: Configure PCSX2 Settings
Launch PCSX2 and you’ll be greeted with the User Interface. Follow these steps to configure the emulator settings:
BIOS: Choose a BIOS you want to use for emulation. The Japan V01.00 is recommended. But anyone will do.
Graphics: Here you can change Renderer, Adapter, and Resolution among other things. We recommend changing the Adapter to your better GPU.
Under the Display tab, the Aspect Ratio can also be changed. We keep it in 4:3 which is the PS2s native ratio but you can change it to 16:9 Widescreen. Just be aware that your games can appear stretched at times.

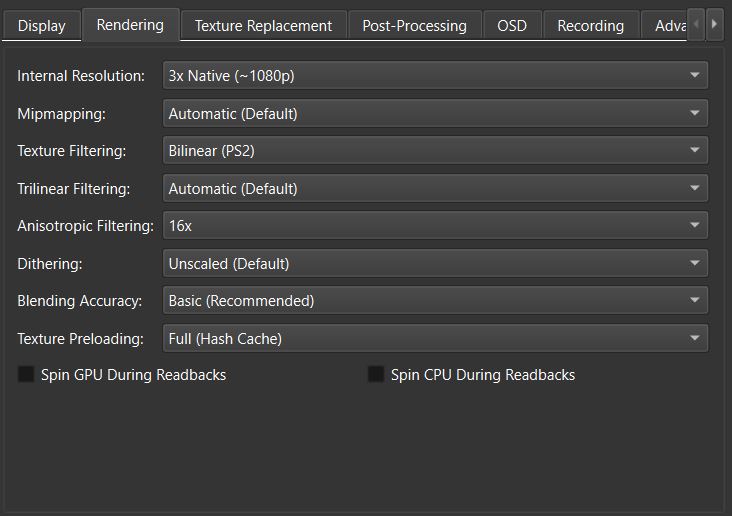
In the Rendering settings, change the Internal Resolution to whatever your screen is. 3x Native 1080p is the standard for most people. Next, change the Anisotropic Filtering to 16x.
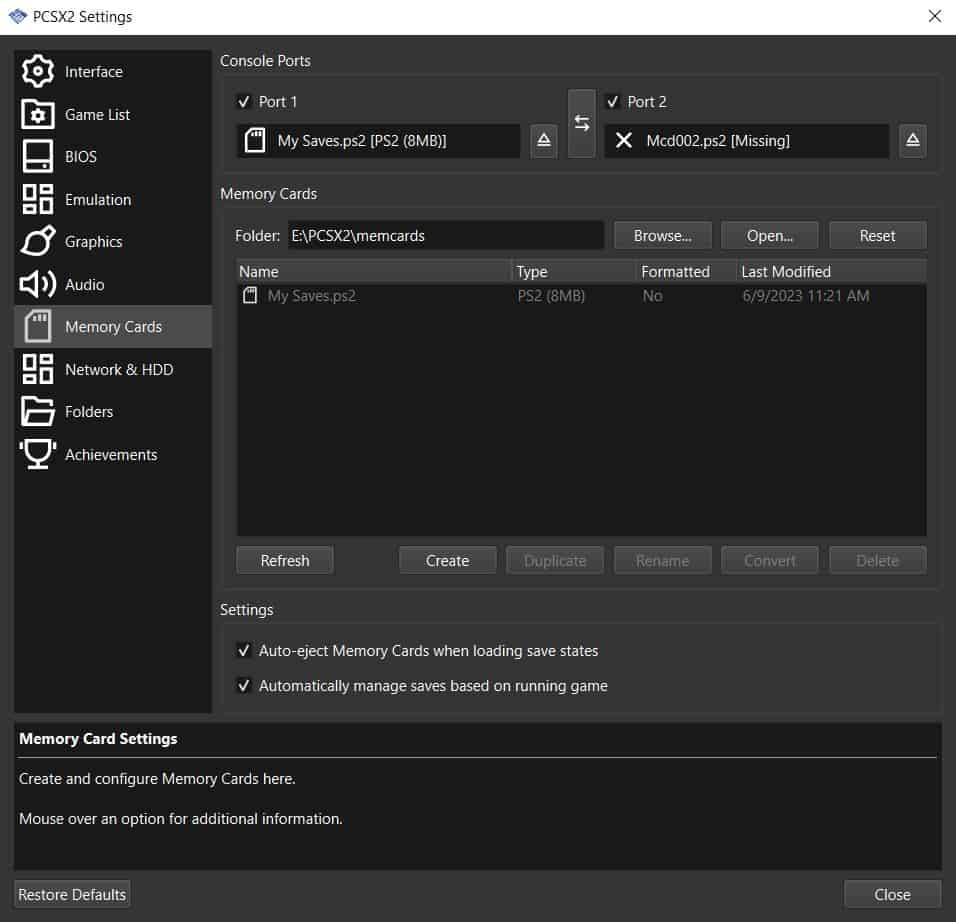
Memory Cards: PCSX2 allows you to save and load game progress using save states. You can also use virtual memory cards to save your games.
You need to create Memory Cards in order to save your games. In the Memory Cards section, select “Create”. Name your memory card and select an 8 MB memory. Then select Ok. You will then see your Memory Card listed. Right-click on it and select “Use for port 1”.
Step 6: Additional Settings
After the initial configuration, you may need to make additional adjustments depending on your preferences and the games you want to play. Here are a few options you might want to explore:
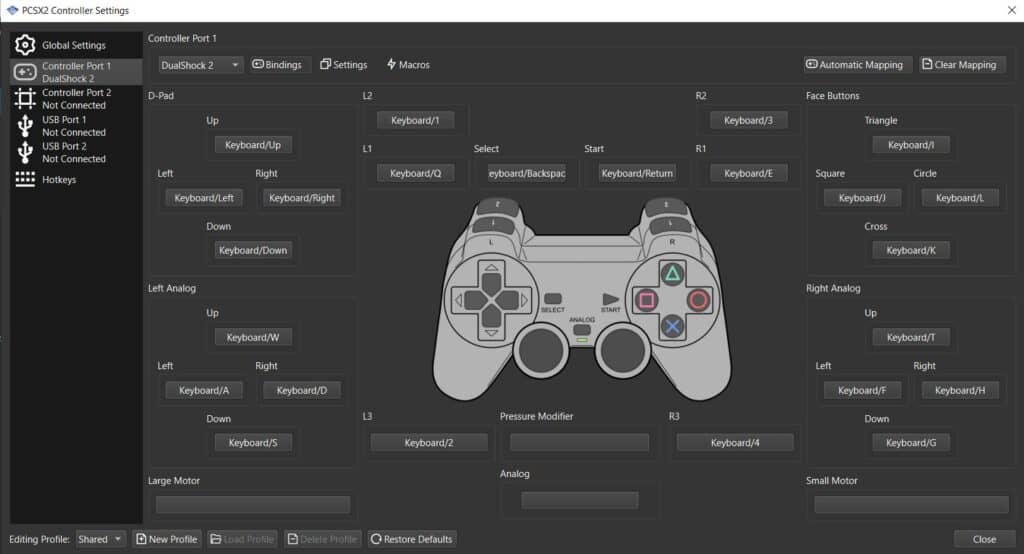
- Controller Settings: If you want to change the controller settings or configure multiple controllers, go to Settings and select Controllers. Most controllers are plug-and-play. However, some may need additional tweaking.
If you wish to play on an Xbox One controller. Plug in your Xbox controller via USB and from the Controller Settings Menu select Controller Port 1 Dualshock 2. Then on the top right select Automatic Mapping. This will configure your Xbox One controller to correspond with PS2 controllers. You can also tweak the button layout to your own preference.
Step 7: Adding & Playing Games
To add to PCSX2, you will require the ISO file for each game. You can scrape these from your actual PS2 discs at home to avoid breaking any copyright laws.
However, you can also get them online if you look around. Just search “PS2 ISOs for PCSX2” and plenty of sites will come up.
After you have obtained the games you want to play. Make sure to keep them all in one folder called PS2 Games or something similar.
From the PSCX2 interface. Go to Settings – Add Game Directory. From there, select your PS2 games folder. Your games should now appear in the PCSX2 application. Simply double-click the game to play.
Ever tried Launchbox? It’s the ultimate tool to have with your PCSX2 emulator or if you’re a Retro gaming fan. Check out our guide on how to setup Launchbox with PCSX2.
Conclusion
That’s it! You have successfully set up PCSX2 and are ready to play PlayStation 2 games on your computer. Remember to follow legal procedures and acquire games and BIOS files through legal means. 😉
Enjoy your gaming experience!